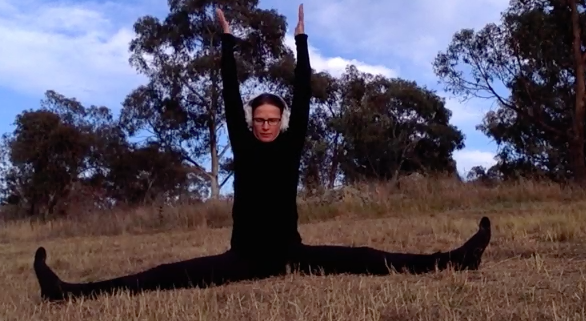
Showing posts with label splits. Show all posts

Friday, 13 November 2015

Interesting core: Side lying splits


We have more interesting 'move from your core' work in this sequence that also leads to splits in another orientation to gravity.  


Remember, you don't have to do the splits--try not to 'aim' for that.  Try your best but don't be attached to an outcome.  Most people will not be able to do the splits and what you might do is bring knee to chest as shown on the left.

You do what feels possible and comfortable for you without straining.  Feel challenged but without mental or physical tension.

I have made two video versions of the sequence.  One to show what you could do for splits variation. The other to show for knee to chest variation.  

You will get a feel for what is possible for you.  

I come into these postures actively.  That means I bring my leg towards my chest without using the hands.  This will require good balance and core stability, as well as good hip mobility.  

Take a look at the videos so you can see the movement in action.  Then take a look at how I deconstruct the postures in the pictures.

Video: Splits Variation


Video: Knee to Chest Variation


Key Actions
Below are some step by step instructions.  Remember do not do anything that hurts.  Be mindful of your knees.  To get into the posture there are some tricky hip movements and whenever you are working with hips you need to be cautious of knees.  

Move slowly so there is no strain.  If you feel strain then go back to the previous position you were in. 

Lunge
In this lunge bring your hand towards the ground but do not 'dump' the weight into the hand.  Support yourself with your legs.  The hand is more there for a bit of balance if you need but you should feel you could take your hand off the ground.


Turn feet 
Both feet turn the same way.  Turn the back foot 90 degrees and onto its side.  Keep your ankle away from the floor.

The front foot turns as well but that is not where the movement comes from.  I actually think about rolling my thigh out rather than moving the foot.   I lift the ball of that front foot and as I roll the thigh out the knee will move out to the side and allow your foot to move with you.  Move slowly and carefully.  If this is not comfortable go back to the lunge and remain there for a while until the side lying part comes up.

Be on the outer edge of the front foot as well.  Keep the ankle away from the ground.

In this position stay lifted out of the arm on the ground.  You could take it away.  To do this you need to ensure you are pushing your front heel down and away from you and firm in your other leg.

Lower hip to floor
Mindfully lower the hip towards the ground.  Go slowly.  No strain.  If in any discomfort go back to the previous position.

Stay lifted out of the arm as though you are pushing that hand down and away from the side of the body and so the chest feels as though it is moving away from the ground.


Lie on your side
This bit gets fun.  Take your arm under the side of your body.  Find a position where it is comfortable.   Feel as though you are pressing that arm into the ground.

Keep your legs and feet firm.

If possible take the top arm to the top side, as shown below.
Try to be in a straight line.  Hips and shoulders stacked on top of one another.  There will be a tendency to drop one hip or shoulder back.

Knee to chest

Carefully bring knee to chest.  Be mindful that you do not drop a hip or shoulder back to come into this position.  Feel your tummy muscles working for this.  As I prepare to come into the position I feel as though I am pushing the sitting bone of that top leg forward.


You can hold there or see if you can straighten the leg, as shown below.
If you straighten the leg, keep the foot and leg away from the floor.  See my foot is not on the ground. 

You can then use your hand to come into an assisted posture.  

Graceful exit
If you are in a good split you can come out of the posture by rolling tummy to ground.


Then coming up into a split.


If you are with knee to chest or if your split is not 'split' enough then hug knee to chest.   Be firm behind the knee (as though you are gripping a rolled up towel or something behind there).

If your knees are ok then carefully roll tummy towards the ground so shin is on the ground.   Be mindful.  If you are lolling around a bit like a beached whale then rethink your exit strategy!  We want graceful exit so your exit might be to come back into a lunge (not pictured).


Then come up like an elegant swan!

In this posture I still want to feel like I am lifting away from the ground.  I press my front foot down into the floor.  I am also using my back foot to press down into the floor.  I feel as though I am drawing the back knee towards my chest so that I am not sinking into it.

You will know if you have got good lift as it will be easy to take the arms up.


Have fun.  Be safe.  Feel like you are doing something but not straining.  Try your best but do not be attached to an outcome.  Move slowly.  Tense less, stretch less, breathe less, and think less.  Smile.  

We will be working with this as part of our sequence for the next 5 weeks.  Join us for outdoor classes, rain, wind or (we hope) sun!

Much metta,
Samantha

www.yogacafecanberra.blogspot.com
www.yogacafelk.blogspot.com


Friday, 23 October 2015

Spine, hips, and hamstrings: Splits Variations

Standing variation of splits
Before you attempt any of these variations you should first review my blogpost about active movement and in particular about the tummy activation (http://yogacafecanberra.blogspot.com.au/2015/10/better-hamstrings-hips-and-spine.html).

In particular review the first video on supine activation (shown again below) that gives you an idea about what your tummy is doing in these postures.


Ok, so now you have reviewed (and practiced and understood) the importance of tummy activation we can have a think about some other thoughts on helping hamstrings, hips, and spine.

In these sequences I highlight the idea of bringing chest to knees.  This is an active movement that we do by initially using tummy activation first and then using hip flexion.

With these postures I am using an active tummy movement then trying to lengthen my spine along the front of the thigh.  A more apt description would be that I am not so much trying to bring chest to thigh but trying to bring belly button to thigh and then take my belly button to the knee along the front of the thigh.

If you are thinking of bringing chest to thigh this can create a tendency to droop or drop the chest when I actually want spinal length.  In this practice if your spine will not lengthen then you are too deep in the posture.

This might require a radical rethink of your postures and movement.

While it may not immediately seem apparent, these are all fairly intense forward bends.  There is a danger of over stretching.  Do not attempt intense forward bends without supervision or a good understanding of your own lower spine.  Best to practice with a teacher.  As with all postures, you must be careful and go slowly.

Video

The video shows how I have lengthened my spine along the front of my thigh in the various incarnations of this posture.  You should only straighten your leg if you can keep your spine long and do not feel strain. This will be beyond the capacity of most people.

STANDING UPRIGHT VARIATIONS
Step 1: Toe and hips forward


Lengthen lower back (sitting bones to heels, top of pelvis back.

Toe forward, hips forward.  This should help create postural firmness in your tummy.

Step 2: Knee raise

Lift knee forward and up.  Make sure you keep hips forward.

Step 3: Spinal forward flexion
I bend forward from my spine to activate tummy muscles more (like I am doing a sit up in my tummy).  I am trying to bring my chest towards the thigh without drooping the chest (keep it long).

Step 4: Push and press

Hold shin.  With bent elbows pull with your hands but press with your shin.

There will be a tendency for the tummy to switch off here as the arms take over.  But keep it on!

I try to wriggle my belly button up along the thigh.  This is lengthening the spine and you will see that my back body is long throughout.

Step 5: Lean back

I lean back to come towards an upright position.  Some people will not be able to keep their chest and thigh together and come fully upright.  So, stay forward and that is where you remain for the rest of the postures (do not go on).

Step 6: Open knee angle
 Keeping all previous activations, take an arm behind the thigh to keep chest and thigh connected.

Slowly start to open the knee angle.  Do this actively.  I am not pulling it open with my hands here.  I use my hand on my heel so I can push my heel into my hand and pull back with my hand.

You might not be able to open the knee angle and keep chest and thigh together so only open so far that they stay together.  This is where you stay.


Step 7: Open
 If the leg will continue to open comfortably then you can take both hands and continue to straighten the leg.

In this position my hand is helping to open my leg.  I am not strong enough to take my leg up this straight against gravity.

But I make active efforts to straighten the leg with my front thigh muscles, and also keep a pushing action of heel into hand and hand into heel.

Tummy stays firm.  Spine stays long.

LUNGING VARIATIONS
Step 1: Lunge
I transitioned to this from the previous posture, keeping chest to thighs and belly button working towards knee.  I kept an active tummy.  Most people will not keep active tummy as this is an easy posture to just collapse into.  This means collapsing tummy and collapsing into the hip joints.

It is important to remember how I came into this posture, which is first through active spinal flexion with tummy activation and then hip flexion keeping tummy firm. Finally, I do some spinal extension but trying to wriggle my belly button up towards my knee.  You can see tieback of my body is long. In fact, it is pretty straight.

In this position I keep my back leg active.

Step 2: Lengthen

I go to a split here.  It is a matter of slowly straightening my legs and keeping everything else the same.  that makes it sound easy.  But it is not!

UPSIDE DOWN SPLIT
Step 1: Short lunge
 Tummy firm, I come to a short lunge.  Keep standing leg active so I don't collapse into my hip.  I keep sitting bones down and top of pelvis back to lengthen lower back and keep front of groin unsquashed.

Step 2: Both knees to chest
 Bring the back knee to chest.  Both knees are working to chest.  Keep front of groins unsquashed.

Step 3: Straight standing leg
Take the raised leg out behind you.  I am rolling that thigh in.  Pelvis level.  Got to be mindful you do not sink into the standing hip and squash the front of groin.

Step 4: Take it up
The raised leg stays rolling in, straight, and I see if I can just take the leg up.  Watch that you are not rolling the pelvis out.

SUMMARY
There you go.  A few more variations

These are tricky ones because they are very easy to collapse into.  It is easy to sink and be passive if you are not mindful.

You might see if you can bring knee close to chest while you are lying on your back and without the hands.  That would be a good indicator of whether or not these variations are going to be possible for you.


 If the knee will not come to close to the chest while lying on your back you are going to find these postures impossible or difficult or else you will probably be doing the by compensating with some other movement.  It might be worth thinking about trying the supine variations for a while longer first.

have fun.  Happy and safe practicing!

Much metta,
Samantha
www.yogacafecanberra.blogspot.com
www.yogacafelk.blogspot.com


Sunday, 5 July 2015

Fun With Splits!


If you clicked on this post you probably are interested in doing the splits.

Great!  In this post I share two places where some splits or splits-like postures sneak into the current sequence I am teaching.

But as you watch the videos (there are two), look at the photos and read through just remind your self that when you practice anything, try your best but do not be attached to an outcome.

If the splits come they come.  If they don't they don't.  Accept that.  Do not force.  Do not strain.  Move slowly.

This is not an instructional post about how to do the splits.  It is a post to show where you can slip them (or like postures) into parts of your practice.

The first of these postures does not come until at least a good 15-20 minutes of the sequence. That means we have moved and warmed ourselves.

Watch the first video, below, which is an interesting variation on a side bending upside down splits that starts with parsvakonasana.  I deconstruct the posture afterwards with step by step photos and instructions.

Then, in the middle of our sequence, take a look at how we move from gadjastan (elephant stance) to the more traditional seated splits.

Upside down side bending splits
The video shows the transition from parsvakonasana to upside down side bending splits.


Deconstructed
1. Come to parsvakonasana.  Watch previous posts on parsvakonasna if you are not sure how.


2. Pelvis remains in place, turn navel, ribs, chest and bring shoulders to the inside of thigh or knee if possible.  Press inner thigh and outer arm into one another.  Be mindful that your butt does not swing out to the side here.

3. Bring inside hand to back of calf from the inside.  Keep nuzzling knee and shoulder into one another.  Press that hand into the calf and calf into hand.  Again, mindful your butt is not off out to the side. 


4.  Other hand comes to ground.

5.  Lean forward and begin to bring that back foot in.  Be on toe tip so there is as little weight on that back foot as possible. 

6. Keep leaning forward, nuzzling arm and leg, pressing calf and hand, and lift off if safe and comfortable.  Look towards your back foot.


Fun on the floor!
Below is a video that shows how we transition from standing to splits on the floor.  

I show two variations--the first is for people more familiar and comfortable with full splits.  

The second is for those less familiar and less comfortable with the splits.  Remember, try your best without being attached to an outcome. 


To come into this posture we start here.

Make our way mindfully to the ground.  Pause and get that tummy firm in a way you can still feel the movement of the breath there!


Go for a upavista konasana--a sort of wide legged side split type posture.  I have my arms reaching up to lengthen my spine and I am working with sitting bones down and top of pelvis back so I am not being too archy in my lower back.


Then, either turn spine and lift and make my way to a split like this....


...or, bend both knees then lift and turn to a long lunge.


Smile and have fun.


Only do what feels comfortable.  Try to practice to your own body and how it is at that moment and not to what you think you should to be doing.  


This is a pose in our current sequence as we work our way through outdoor yoga in chilly Canberra (the ear muffs might be a give away!).  The posts are intended for students who work with me and know my teachings.  Overseas we can work on these in my upcoming retreats in Sri Lanka (July 2015) and Bali (September/October) 2015 (see www.artofliferetreats.com).

Happy and safe practicing!

Much metta,
Samantha

www.yogacafecanberra.blogspot.com
www.artofliferetreats.com
www.yogacafelk.blogspot.com


Saturday, 16 May 2015

Balance on the edge


I have been talking about balance in classes this week.

My sequences contain a lot of one legged standing postures.

They help you cultivate stability and mobility around the ankles, knees and hips.

They are also one of the things new students find the most challenging about this style of yoga.

In this video I show myself refining my balance by practicing on the edge of a park bench.  You need to have developed a bit of confidence to try this.

Some of you will be ready for this type of challenge, some of us are still working on getting into balance on solid ground.

Below I share a few thoughts and tips on cultivating better balance.

A slow lift not a catapult 
When I look around in class, sometimes I see people flinging their limbs around in an effort to bring them up and balance.

There is often a bit of wild jabbing and toe-up-toe-down-fling-up-fall-down manoeuvring.  
Sometimes it works.

Most often it is just a bit frustrating for the leg flinger (from the looks on faces) and I am reminded of a baby bird just flapping its wings around but never taking flight.  Having said this I am sometimes guilty of this type of wild flinging--especially when practicing other types of balances like handstands!

When I balance I try to get a sense of the weight shift so the balance feels more like coming into flight.  The initial lift feels mostly effortless in the limb that raises--your foot almost comes off by itself.

Remind yourself balance is about subtle shifts in your centre of gravity.

It might help to think about old fashioned scales where you put weights on one side to try and match the weight on the other so that both sides are equal.

When working with your body you are gradually shifting more weight to one side so that the other side starts to feel lighter.  When you get to the 'sweet spot' the toe feels so light that raising it becomes irresistible.

In all of this, it helps to move slowly.

Feel the grip of the toes
When coming into a balance where the lifting leg is behind the body I gradually shift my weight forward.  If I move slowly I get to a point where the toes of the standing (front) leg naturally start to grip.

They do this so you don't fall on your face!

When you get that initial (natural) grip it is a good indicator that the back toes are getting ready to lift.

One you get that initial seemingly effortless lift, you need to put in some more thoughtful and active effort to raise that leg further.

Relax your face
You don't need a strong tongue, eyeballs, throat, or lips to balance.  But these places often start to get tight when coming into balances.  Perhaps because we are concentrating.

If possible, see whether you can relax those places.

You might notice that, on a physiological level, you start to feel more calm.  That will help with the balance.

It does help to look at the ground/floor with your soft eyes.

Be mindful of keeping lifted out of the standing hip
In the video I do a balance where the leg behind lifts then transition to bringing that leg in front of me and standing upright again.

In both types of balance I am working mindfully to stay lifted out of the standing (weight bearing) leg hip.

That means in my standing leg I am trying to keep front of groin open, keeping a sense of moving the outer hip towards the inner thigh, and rolling the standing thigh out.

Practice heel raises
The opening sequence in my classes involve a set of active heel raises to help cultivate stability in your ankles.

When we do these heel raises we try to lift outer feet toward outer ankles.

This helps to strengthen the muscles on the outer ankles and really helps with your balance.

I will need to post a video of that next!

Until then, happy and safe practicing.


www.yogacafecanberra.blogspot.com
www.yogacafelk.blogspot.com
www.artofliferetreats.com

Sunday, 21 April 2013

Hanumanasana: Two Great Prep Poses


Hanumanasana, or the front splits, combines backbending and forward bending.  There are lots of ways to prepare yourself for this pose.   Here I will show two of my favourites asanas to get you on your way.

Parsvottanasana

Parsvottanasana using wall for support (Yoga Journal Magazine)

This is one of the all-time most effective poses to open the muscles along the back of front leg and outer hip.  When performed mindfully it will strengthen as well as lengthen the hamstrings and hip extensors.  Some tips to come into this pose:
  •             Outer edge of front foot parallel to outer edge of the mat—the heel turns slightly out. 
  •             Back foot positioned about 30 degrees from parallel—toes out and heel in.
  •             Hips pointing straight ahead (tail pointing straight back).
  •         Squeeze heel of front foot in towards the centre of the mat and press ball of foot outwards.  Note the foot doesn’t move but you should feel ankle stabilise and some movement at the hip joint.
  •        Lift outside edge of the foot towards the outer ankle.
  •       Press firmly through the ball of the foot, as though trying to push it through the floor and forwards.
  •        Stretch the mat with your feet—try to push the front foot forward and the back foot backwards. Then, try to pull the front thigh towards the back and the back thigh towards the front as though they were moving towards one another.  Lift them up into the sockets as well.
  •       Scoop the front sitting bone down and under towards the centreline of the body, as though it is moving towards the opposite sitting bone.   Another way to think about this is to see if you can roll the front thigh bone out (as though the knee were trying to turn out) from high up near the hip.  This is one of the most important actions and when performed, will make an enormous difference to the feel of the pose.  

All of the work being done with the feet and legs should combine to make the torso, spine and arms feel light and free.

From here, lift up out of your legs and start to fold forward.  Think up and forward rather than down. 

You will need to keep the front hip scooping and maintain the other leg/foot actions as you start to go up and forward or you will lose the freedom in the spine.  There is a lot of hard work going on in the legs.

In this variation, resist the urge to drop your chest and round your upper back.  Rather, try to maintain a long spine and keep it parallel to the earth.  Try to keep a feeling that you are doing a back bend in your upper back.  It doesn’t have to be a big effortful backbend—a baby one is just fine. 

Take your arms onto your front leg (or a wall as in the photo) without reaching so they are not just dangling.  Pull your armpits lightly towards your waist. 

Try to keep your natural lumbar curve.  Then, maintaining the natural curve, attempt to push your sitting bones down and forward (as though they were arcing in a circle towards your navel).  This will bring a light firmness to your lower belly and enhance the activation of the hamstrings which will be lengthening and strengthening. 

In Between
Take downward facing dog in between sides.  Feel the difference between the two legs.

Standing lunge
Bianca Machliss (Yoga Synergy) in san calasana with arms overhead

With the forward bend taken care of, move to the backward bend. When practicing this variation try not to keep the spine upright but relaxed.  Watch for the ribs that can tend to project out. 

Step into a long lunge and follow the following steps:
  •            Outer edge of front foot parallel to the outside edge of the mat, it will feel like the toes are turning in slightly.
  •            Scoop the front sitting bone under as for the previous pose, as though the front sitting bone is moving in an arc down and to the opposite side.  If you can manage to think of it, focus around the hip socket itself and try to roll the thigh bone out.  Then, try to pull the knee in towards the hip socket from the inner thigh.  To enhance these two actions try to squeeze the heel of the front foot in towards the centre of the mat (without moving it) and try to press the ball of the front foot out to the edge of the mat (without moving it).
  •            The back heel points up to the sky.  Draw the outer edge of the foot closer to the outer knee.
  •           Press the ball of the back foot strongly into the floor.  Try to move the top of the foot closer to the shin without moving it. Try to pull the heel towards the back of the knee without moving it.
  •           Attempt to pull the back foot forwards towards the front foot.  At the same time attempt to pull the front foot backwards. 
  •           Make sure the back thigh bone/knee points down to the floor.
  •          ‘Suck’ the back thigh bone up towards the torso, as though your leg started from your armpit.  If this makes no sense to you then try to flex the back hip (bend it) from its extended position (as though you were trying to bend at your hip to bring the back knee to your chest).
  •           Scoop the back leg sitting bone down and forward in an arc.  This will firm the lower belly and, when performed in conjunction with the instruction above, will start to activate the muscles that you are stretching.  You will feel the posture becomes much more active.
  •           Try and keep the scooping down and forward arc of the sitting bones with the sucking of the back leg to get a feeling that the sitting bones are lifting from beneath you and sending your whole spine upwards. 
Simon Borg Olivier (Yoga Synergy) in parsva san calasana.
The back foot is different but note the arm variation here, which is really a side bending variation. 
  •           Try an arm/side bending variation to enhance the stretch felt across the front of the back thigh. Take the arm of the back leg up to the sky and push the armpit up and forward in the direction it is facing.  Press that elbow over towards the opposite side of the body.  Take the arm of the front leg down beside the front hip and push the armpit down.  The torso will be in a side bend.  Press the front sitting bone down and forward and keep pressing the front knee in towards the centre line of the body. 
  •           Breathe.
You can see how this long lunge can keep extending into a backbend, as my teacher Paddy McGrath demonstrates below.  The more you scoop and suck the legs and sitting bones the more freedom in the spine, which can start to lift up and into a circle.  If Paddy just snuck her front leg out straight (which she can) she'd be in a(n extreme) version of hanumanasana!
Paddy McGrath in a very long lunge and backbend


The End


Hanumanasana is a combination of the forward bend of parsvottanasana and the back bend of the long lunge.  You could do a lot of different poses to prepare yourself for the challenge of the forward splits but I would recommend that whatever other poses you do, you perform these two actively.  They will give you strength and flexibility.  Be sure to combine the 'scooping' of the front sitting bone down and towards the centre of the body and the 'sucking' of the thigh bones into their sockets that is present in both of the poses to help you on your journey!