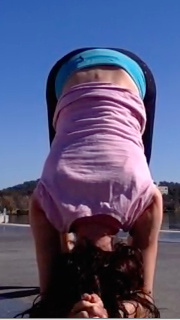
I had the privilege of visiting Croatia again recently, to see a dear friend from way back when I lived and worked in Bangladesh.
Her talents and generosity seem boundless and, along with her partner, they produced this lovely video for me.
This is a ten minute sequence filmed by a lake amongst the olive groves that abound in Dalmatia. The overall effect reminds me of practicing yoga in a Renaissance painting.
My friend, Mejrema, composed the music herself and it is from an album she produced while working with people with autism as part of an art in therapy project. It fit perfectly with the mood. It also fit perfectly with me since my full-time work is with people with autism.
I did not plan this sequence. We saw a beautiful scene. We set up a camera. I stood for a moment, took a few calm breaths, and practiced what came to me in the moment.
The sequence consists of some strong standing balances, but if you were practicing it you could modify it so you either kept your toe on the ground or you hugged your leg to your body, rather than straightening it as I do.
There are also some standing twists and side bends. Again, you could modify these to your capacity.
When I reviewed the footage I loved how my knobbly arms and legs seemed to blend with the branches of the olives.
The olive is sacred to the people of this area. I love how their silvery leaves sparkle in the breeze.
I smile when I see this video. I hope you will too.
In the second part of our standing phase of the current series we do this warming, lengthening, strengthening (not to mention challenging) sequence of five linked postures.
This will really connect you to your outer/side thigh/butt area of the front leg. Remember to stretch less, tense less so if it is too intense then back off.
I did this sequence five times in 36 hours while teaching classes (not sure why I have scheduled five classes in that time frame!) and by the fifth time it was as though I had new hips. It made me think I should see if you can get a medicare rebate or something back from your health fund for coming to class as it should feel as though you have a whole new pelvis.
Runners and cyclists, I think you will particularly enjoy it!
Be mindful that you stay lifted out of the front hip so you feel tall rather than sinking.
Also, remain mindful that the front thigh rolls out and back thigh rolls in.
No squashing in the lower back. It should feel free.
I hope you enjoy this!
I have put the main postures below, with a few optional extras, which is why there are more than 5 steps.
1. From standing, step back...
2. To parsvakonasana...
3. Optional bind only if you can get it in the first second. Otherwise, let it go...
4. Turn this into a standing balance...
5. Then back to a lunge and turn it into a standing balance the other way (active spinal twist towards the thigh)...
6. To parivrttta parsvakonasana...
7. With an optional bind if it comes in the first second. Otherwise, let it go...
8. It is almost finished! Turn back to front and turn it into a standing split without arms ...
9. Ta da! You did it. Wowee. Walk around and see if you can sense a difference between your two sides before trying the second side.
Remember, these posts are mainly for people who practice with me and come to classes or who have an experienced teacher whom they can ask questions of and get feedback from. Learning from the internet is not recommended.
Might have to think about hip mindfulness workshop soon. Remind me to help you with this at our upcoming Sri Lanka retreat (16-19 July 2015) and in Bali in September!
Forearm balancing, when done well, is a great way to release tension in the spine, which includes the neck since it is part of the spine. It also includes the shoulders. That means you are in the wrong pose if you practice this posture and have a sense of tension or strain anywhere but especially around the neck or shoulders.
This is the pose I recommend you be able to complete before making efforts to do a headstand.
In this posture, which we call horn stand (your hands are clasped except for your baby finger which is sticking out to form a horn) there is no weight on the head at all.
To do it you must have adequate strength and mobility around the shoulder joint complex while your feet are both on and off the ground.
As in many postures, the preparation is more difficult than the final posture.
In this post I share a few tips about preparing to come into this balance. This includes my thoughts on the use of the wall and how I use it in a limited fashion, along with common errors and how to use a block to help you prepare.
First, here is a video of me free balancing so you get an idea of the final posture.
I practiced on the grass today since I was matless and sleeveless and the concrete was too scratchy on my elbows.
Now, to get there I recommend a few stages of specific preparation (as distinguished from the non-specific just general stability and strengthening and movement you do through my classes).
Base preparation
Number one is to get the horn. See the picture below.
The 2-4 digits are interlaced. The palms are pressed together. The thumb and baby finger are free. The baby fingers point out like a horn. The horn is going to help you balance in the final posture, with the weight shifting between horn and elbows.
The elbows are about shoulder width apart but I prefer to try a bit narrower since the tendency is for them to splay out on tight shouldered people.
Then get the lower ribs high up away from the ground and get your head and neck so you are looking to your navel. The upper and middle back will feel rounded. The lower back is lengthened, not arched.
When you get your lower ribs far away from the ground your head will come away from the ground. You cannot see it in the photos because there is so much hair tumbling down. In the first video I kept my head forward so you could see it is not on the ground.
In the wall video I kept it looking to navel and then moved it back and forth a bit so you can see it there as well.
I am firming my tummy in a way that I can still breathe. If you don't know how to do this you need to look back at previous posts or come to class. It is important.
I push my horn and wrist downward and feel as though I am pushing my elbows forward. I can't show a picture of those things. They are 'secret' internal actions.
Beware the sinking shoulders
Sinking the chest and into the shoulders is one of the common errors in this posture. See the example of sinking shoulders from the side and front views, below.
Compare this with the lower ribs lifted into lower back in the next picture. You can see that the wrinkles in my t-shirt have ironed themselves out.
And sinking with the knees raised...
Versus lifting with the knees raised...
Again, you see how many wrinkles in the shirt appear around the lower back in the sinking version.
Get strong!
With the base set, I start some strengthening and mobility practice.
I take my knees just a tad from the floor. Enough so an ant or grasshopper could go underneath without being squished.
Move slowly and do not sink into your shoulders or drop the ribs.
This should create postural firmness in the tummy in a way you can breathe if it was not there already (and if you had not sucked it all in).
You can go a bit higher so a little puppy could run under your knees.
I go slowly up and down. I make sure I do not drop in my shoulders. I keep horn pushing down, elbows pushing forward, neck free, tummy can breathe (but firm).
I can come higher and perch on the very tips of my toes. I try to get off the balls of my feet. If you have weight going through the balls of your feet you won't get enough weight through the arms.
You just stay there and breathe. Make a few jokes to passersby. Be firm but relaxed and calm.
If you can, you take a knee into chest, heel to bottom. But you go slowly and make sure you do not collapse into one shoulder or drop the chest.
Take note. If this feels tough it is because THIS IS REALLY HARD!
It is really hard to go through these stages without sinking into your shoulders and feel comfortable.
Stay here and keep practicing at this level until you can at least feel comfortable for more than 30 seconds I say. That's not science but hopefully you get the picture.
Block practice
The video below shows my block practice.
I go to the blocks in class sometimes to help people get an idea of what it can feel like to be upside down.
You don't need to kick up to do this so as long as you have some good strength around shoulders and core it should be accessible.
If you are not strong enough you will find it difficult to get a leg off the ground so go back to the first (ground) practice.
I push the ball of one foot into the block and then the other foot starts to come up. Alas, most of the important parts to see are in shadow in the photo below!
You can just hover a little away from the ground or start to bring knee to chest.
And finally take the leg directly up.
The head is down and looking towards the navel. It feels really great if you are in the correct position.
A word of caution about block practice is that it can feel so good you might like to take both feet off. I don't advise trying. Mainly because if you crash down you are going to smash your feet into the block. Ouch.
Wall practice
Ok, so I really don't use the wall for any of the inversions. All of my students will know how I sort of begrudgingly take us over there only on very rare occasions! The video below shows how I use the wall if I use it.
You can see I missed the first two times because I was trying to lightly kick up.
One of the reasons I have developed a no wall practice is because I think people go to it too early. They try to build strength at the wall when you need to build strength on the ground. It is actually much harder to do the first position that I described (ground version) than it is to do either the block or wall variation. Perhaps that is why people go to the wall!!
Anyway, if you are going to a wall, psychologically you will know it is there. Most people will therefore just over-kick or not worry about refining their kick because we know the wall is there to catch us. People who spend too much time at the wall seem to take longer to learn to free balance.
Thus, if you use it do so sparingly I say! And, if you must, then perhaps try this way.
I show using the wall with just a toe tip touching. I try and take one leg straight up and be on the other toe tip. I then figure out where that up leg needs to be to help me find my centre of gravity. I can also learn to 'play' with the weight between horn and elbows. You should find that if you are on a toe tip and you press through the horn that the toe tip starts to float away from the wall.
So for me the lesson of the wall is to learn about how to play with and find your centre of gravity upside down. But this is a refining technique to try once you have built the strength!
Summary
Look for lifting not sinking. Firmness but calmness. Lightness not heaviness. This is a great way to practice all postures, but especially for these inversions.
This is the same approach I take to handstand so you can apply these ideas on ground, block and wall but just with the arms straight!
Happy and safe practicing! Remember, these videos and posts are intended for students who come to my classes and who can ask questions and interact with a real person about their own bodies. Learning from the internet is not recommended.
This is the type of thing I teach in my classes and which we regularly workshop in retreats. Join us if you like!
I have been talking about balance in classes this week.
My sequences contain a lot of one legged standing postures.
They help you cultivate stability and mobility around the ankles, knees and hips.
They are also one of the things new students find the most challenging about this style of yoga.
In this video I show myself refining my balance by practicing on the edge of a park bench. You need to have developed a bit of confidence to try this.
Some of you will be ready for this type of challenge, some of us are still working on getting into balance on solid ground.
Below I share a few thoughts and tips on cultivating better balance.
A slow lift not a catapult
When I look around in class, sometimes I see people flinging their limbs around in an effort to bring them up and balance.
There is often a bit of wild jabbing and toe-up-toe-down-fling-up-fall-down manoeuvring.
Sometimes it works.
Most often it is just a bit frustrating for the leg flinger (from the looks on faces) and I am reminded of a baby bird just flapping its wings around but never taking flight. Having said this I am sometimes guilty of this type of wild flinging--especially when practicing other types of balances like handstands!
When I balance I try to get a sense of the weight shift so the balance feels more like coming into flight. The initial lift feels mostly effortless in the limb that raises--your foot almost comes off by itself.
Remind yourself balance is about subtle shifts in your centre of gravity.
It might help to think about old fashioned scales where you put weights on one side to try and match the weight on the other so that both sides are equal.
When working with your body you are gradually shifting more weight to one side so that the other side starts to feel lighter. When you get to the 'sweet spot' the toe feels so light that raising it becomes irresistible.
In all of this, it helps to move slowly.
Feel the grip of the toes
When coming into a balance where the lifting leg is behind the body I gradually shift my weight forward. If I move slowly I get to a point where the toes of the standing (front) leg naturally start to grip.
They do this so you don't fall on your face!
When you get that initial (natural) grip it is a good indicator that the back toes are getting ready to lift.
One you get that initial seemingly effortless lift, you need to put in some more thoughtful and active effort to raise that leg further.
Relax your face
You don't need a strong tongue, eyeballs, throat, or lips to balance. But these places often start to get tight when coming into balances. Perhaps because we are concentrating.
If possible, see whether you can relax those places.
You might notice that, on a physiological level, you start to feel more calm. That will help with the balance.
It does help to look at the ground/floor with your soft eyes.
Be mindful of keeping lifted out of the standing hip
In the video I do a balance where the leg behind lifts then transition to bringing that leg in front of me and standing upright again.
In both types of balance I am working mindfully to stay lifted out of the standing (weight bearing) leg hip.
That means in my standing leg I am trying to keep front of groin open, keeping a sense of moving the outer hip towards the inner thigh, and rolling the standing thigh out.
Practice heel raises
The opening sequence in my classes involve a set of active heel raises to help cultivate stability in your ankles.
When we do these heel raises we try to lift outer feet toward outer ankles.
This helps to strengthen the muscles on the outer ankles and really helps with your balance.
In this post I show videos and step by step instructions on how to help unsquash the front of hips and lengthen lower back. They are great tips for people who spend a lot of time sitting, which is most of us in general.
Key Instructions
I have a limited repertoire of what I consider some basic instructions.
No matter what sequence I teach these instructions repeat themselves over and over.
They repeat themselves over and over in single class.
Sometimes I wonder why people keep coming back since I do say the same thing over and over again!
I like to think that it is perhaps my wit and good humour that brings people back.
But I am pretty sure it is because while these instructions sound simple, they are actually tricky to apply, to apply consistently, and to apply in different orientations to gravity.
One of those instructions is "sitting bones down, top of pelvis back, lengthen lower back."
For people who have tight lower backs, and even people who do not, this instruction feels amazing on the lower back.
However, I could also say, "sitting bones down, top of pelvis back, unsquash front of hips."
You see, depending where you focus, or perhaps where you feel more tightness, the same instruction can help in two places.
Most people live a lot of their lives squashing the front of hips. Well, those that sit for most of the day do.
So this instruction is a great way to help unsquash.
It is particularly useful to apply in forward bending postures.
I keep the front of groin open (unsquashed) when I practice forward bending postures.
It is the opposite of what many people practice--either deliberately or incidentally.
It means you work on spinal forward bending then hip flexion rather than just hip flexion, which often happens.
Some Thoughts Before You Watch And Practice
For me yoga is a spinal movement practice. In order to maintain the health of your spine you need to learn how to move it, and move it safely. Unsquashing is key. Being able to create firmness in they tummy in a way you can still feel the movement of the breath there while mobilising the spine are also key.
In the videos I chose a modified chandra namaskar to show the differences between squashing and unsquashing. One video shows me showing what squashing looks like versus unsquashing. The other video just shows a smooth unsquashing practice.
I have also taken still shots so you can compare the two side by side.
Perhaps watch unsquashing versus squashing first. Then look at the still shots. Then watch the unsquashing so you are left with a clear impression of unsquashing.
When watching these videos please consider that I mainly post things for my own students who come to me and whom I can watch carefully. Practicing from videos is a not the best, especially if you have pre-existing issues.
Also note that in the videos below I create firmness in my tummy in a way I can still breathe into it. I have written about this a lot before so please refer to those posts. Whenever I bend forward from the spine I create firmness first. I am trying to have core stability with mobility. Much of what I show will not work if you suck your tummy in tightly (using muscles of forced exhalation) because this will stiffen the spine.
Squashing Versus Unsquashing: The Video
This video shows me trying to highlight squashing versus unsquashing in the same poses.
Squashing Versus Unsquashing: The Still Shots
Below I show the shot of being squashed on the left and unsquashed on the right.
In the squashed shots I performed the actions of moving the top of my pelvis towards the front of thigh and pushing my sit bones up into the air.
In the unsquashed shots I performed the actions of moving my sitting bones down and top of pelvis back.
You can see I put my hand to the place that I am concentrating on. One finger is at top of front of pelvis and the other on the thigh bone.
In most shots you can see the 'air' in the unsquashed variation. You can also see that my lower back lengthens or is less 'archy'.
In all forward bends I try to firm my tummy in a way I can still breathe. I also feel that I am pushing both hips forward without actually moving them.
Unsquashing: The Movie
Here I show the whole sequence with just the unsquashing version.
The End
That's it from me today.
Happy and safe practicing. This is the type of thing I teach in classes, workshops, and my retreats in Canberra, Sri Lanka, and Bali. If you are around I would love to teach you.