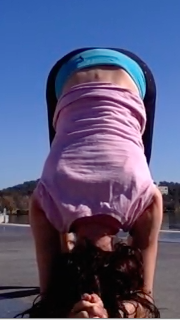
It has taken me a long time to get to a full mayurasana like this one. Scroll down to the end of the post to see a cool video of how to transition out of gomukhasana via mayurasana, which we practice in my current sequence.
The funny thing is less than six months ago I was trying this pose in the park and I could not extend my legs fully.
The only way I could do the pose was to have bent knees or put them into a bind like padmasana. Below is a photo taken of me earlier in the year that shows my best effort.
On that day in February it seemed to me unlikely, perhaps even impossible, that I would manage a fuller variation of the posture.
So what changed?
Did I start practicing mayruasana every day?
Actually, no. I don't remember doing mayurasana very much or at all since then.
The main difference, and what I perceive has made the most difference, is in my last sequence (just finished) I mixed up my surya namaskar slightly.
I like to introduce a little change each sequence--not so much in the poses themselves but the transitions between them or how long we hold them for.
The last sequence I worked with holding my high planks for longer, then incorporated a double push-up with good technique (on my knees most of the time) before lowering to the ground for a shalabhasana variation (prone extension with hands by side).
There were no mayurasanas in my last sequence so there is no doubt that my improved mayruasana was not due to practicing mayurasana.
I am reminded of the time I stopped practicing padmasana because I could not come into it without using my hands.
Instead I worked with good technique in standing postures and one day I decided to try padmasana without hands again and to my surprise I was able to do it.
So it happened today that I tried mayurasana and realised, hey, my legs are straight here!
Mayruasana is a challenge for a lot of women, who tend to be bottom heavy.
In my understanding that is why it is easier for women (but not easy) to come into the pose with knees wide and bent.
The variation I show in my video might work for those who can come into gomukhasana and then perhaps transition to the other side using a gomukhu-mayurasana pose.
This posture is strong on the wrists and you need to have developed a good ability to hold your body weight on your hands without straining the wrists before you try.
I will run through this in class and at my upcoming retreats in Sri Lanka and Bali (www.artofliferetreats.com), but, for now, watch the video and note the placement of elbows somewhere just below the navel, the distance of the knees from the hands, that I am pressing strongly with my fingertips, and that I am maintaining a sense of ease and comfort within a challenging posture.
Forearm balancing, when done well, is a great way to release tension in the spine, which includes the neck since it is part of the spine. It also includes the shoulders. That means you are in the wrong pose if you practice this posture and have a sense of tension or strain anywhere but especially around the neck or shoulders.
This is the pose I recommend you be able to complete before making efforts to do a headstand.
In this posture, which we call horn stand (your hands are clasped except for your baby finger which is sticking out to form a horn) there is no weight on the head at all.
To do it you must have adequate strength and mobility around the shoulder joint complex while your feet are both on and off the ground.
As in many postures, the preparation is more difficult than the final posture.
In this post I share a few tips about preparing to come into this balance. This includes my thoughts on the use of the wall and how I use it in a limited fashion, along with common errors and how to use a block to help you prepare.
First, here is a video of me free balancing so you get an idea of the final posture.
I practiced on the grass today since I was matless and sleeveless and the concrete was too scratchy on my elbows.
Now, to get there I recommend a few stages of specific preparation (as distinguished from the non-specific just general stability and strengthening and movement you do through my classes).
Base preparation
Number one is to get the horn. See the picture below.
The 2-4 digits are interlaced. The palms are pressed together. The thumb and baby finger are free. The baby fingers point out like a horn. The horn is going to help you balance in the final posture, with the weight shifting between horn and elbows.
The elbows are about shoulder width apart but I prefer to try a bit narrower since the tendency is for them to splay out on tight shouldered people.
Then get the lower ribs high up away from the ground and get your head and neck so you are looking to your navel. The upper and middle back will feel rounded. The lower back is lengthened, not arched.
When you get your lower ribs far away from the ground your head will come away from the ground. You cannot see it in the photos because there is so much hair tumbling down. In the first video I kept my head forward so you could see it is not on the ground.
In the wall video I kept it looking to navel and then moved it back and forth a bit so you can see it there as well.
I am firming my tummy in a way that I can still breathe. If you don't know how to do this you need to look back at previous posts or come to class. It is important.
I push my horn and wrist downward and feel as though I am pushing my elbows forward. I can't show a picture of those things. They are 'secret' internal actions.
Beware the sinking shoulders
Sinking the chest and into the shoulders is one of the common errors in this posture. See the example of sinking shoulders from the side and front views, below.
Compare this with the lower ribs lifted into lower back in the next picture. You can see that the wrinkles in my t-shirt have ironed themselves out.
And sinking with the knees raised...
Versus lifting with the knees raised...
Again, you see how many wrinkles in the shirt appear around the lower back in the sinking version.
Get strong!
With the base set, I start some strengthening and mobility practice.
I take my knees just a tad from the floor. Enough so an ant or grasshopper could go underneath without being squished.
Move slowly and do not sink into your shoulders or drop the ribs.
This should create postural firmness in the tummy in a way you can breathe if it was not there already (and if you had not sucked it all in).
You can go a bit higher so a little puppy could run under your knees.
I go slowly up and down. I make sure I do not drop in my shoulders. I keep horn pushing down, elbows pushing forward, neck free, tummy can breathe (but firm).
I can come higher and perch on the very tips of my toes. I try to get off the balls of my feet. If you have weight going through the balls of your feet you won't get enough weight through the arms.
You just stay there and breathe. Make a few jokes to passersby. Be firm but relaxed and calm.
If you can, you take a knee into chest, heel to bottom. But you go slowly and make sure you do not collapse into one shoulder or drop the chest.
Take note. If this feels tough it is because THIS IS REALLY HARD!
It is really hard to go through these stages without sinking into your shoulders and feel comfortable.
Stay here and keep practicing at this level until you can at least feel comfortable for more than 30 seconds I say. That's not science but hopefully you get the picture.
Block practice
The video below shows my block practice.
I go to the blocks in class sometimes to help people get an idea of what it can feel like to be upside down.
You don't need to kick up to do this so as long as you have some good strength around shoulders and core it should be accessible.
If you are not strong enough you will find it difficult to get a leg off the ground so go back to the first (ground) practice.
I push the ball of one foot into the block and then the other foot starts to come up. Alas, most of the important parts to see are in shadow in the photo below!
You can just hover a little away from the ground or start to bring knee to chest.
And finally take the leg directly up.
The head is down and looking towards the navel. It feels really great if you are in the correct position.
A word of caution about block practice is that it can feel so good you might like to take both feet off. I don't advise trying. Mainly because if you crash down you are going to smash your feet into the block. Ouch.
Wall practice
Ok, so I really don't use the wall for any of the inversions. All of my students will know how I sort of begrudgingly take us over there only on very rare occasions! The video below shows how I use the wall if I use it.
You can see I missed the first two times because I was trying to lightly kick up.
One of the reasons I have developed a no wall practice is because I think people go to it too early. They try to build strength at the wall when you need to build strength on the ground. It is actually much harder to do the first position that I described (ground version) than it is to do either the block or wall variation. Perhaps that is why people go to the wall!!
Anyway, if you are going to a wall, psychologically you will know it is there. Most people will therefore just over-kick or not worry about refining their kick because we know the wall is there to catch us. People who spend too much time at the wall seem to take longer to learn to free balance.
Thus, if you use it do so sparingly I say! And, if you must, then perhaps try this way.
I show using the wall with just a toe tip touching. I try and take one leg straight up and be on the other toe tip. I then figure out where that up leg needs to be to help me find my centre of gravity. I can also learn to 'play' with the weight between horn and elbows. You should find that if you are on a toe tip and you press through the horn that the toe tip starts to float away from the wall.
So for me the lesson of the wall is to learn about how to play with and find your centre of gravity upside down. But this is a refining technique to try once you have built the strength!
Summary
Look for lifting not sinking. Firmness but calmness. Lightness not heaviness. This is a great way to practice all postures, but especially for these inversions.
This is the same approach I take to handstand so you can apply these ideas on ground, block and wall but just with the arms straight!
Happy and safe practicing! Remember, these videos and posts are intended for students who come to my classes and who can ask questions and interact with a real person about their own bodies. Learning from the internet is not recommended.
This is the type of thing I teach in my classes and which we regularly workshop in retreats. Join us if you like!
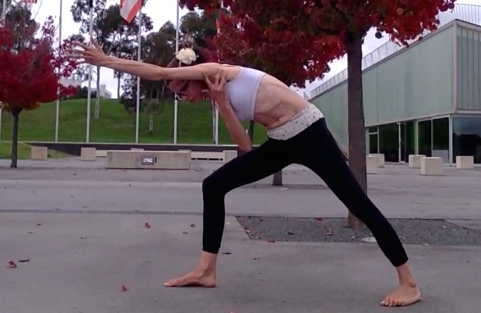
Parsvakonasna: A forward bending, side bending, twisting, backbend
If I could only give one instruction in class it would be something like, find lift in your postures. Find lightness.
Okay, that's two, but that's what guides me through my self-practice reflection whenever I encounter and practice moving and postures.
That said, I encourage students to be mindful that they are not collapsing in their postures.
People who are very flexible often collapse out of habit, especially if they have not developed strength to balance their flexibility.
People who are stiffer might do it to try and get deeper into an image of a pose they think they should be in, often with some strain.
I have little slips and sinks and collapses that I still need to think of myself! It is an ongoing work.
In standing poses there is always the possibility of sinking into the hips. In arm balancing poses there is the possibility of sinking into the shoulders. In backbends it tends to be sinking into the lower back.
In this post I look at a way to try parsvakonasana without sinking into the front hip.
I describe the key actions that give strength and stability to this pose and which help develop mobility.
I pay particular attention to some key spinal actions that will help you develop a strong and mobile core.
I have included two videos. One has more slow and detailed visual instructions. The other highlights the difference between lifting and sinking in the front hip.
I have also included step-by-step visual and written instructions, breaking down the pose into key leg, spinal, and upper body actions.
As with all my posts, I really write these for my students to practice outside of class. If you are not a student of mine I encourage you to come to class or find a suitably qualified teacher who can help you better understand the feeling of these actions in your body!
Perhaps watch the key actions video first. Then review the step-by-step instructions. Then watch the difference between sinking and lifting.
Key actions video
This video shows me using my mime skills to show you how to come into the posture.
Perhaps the highlight of this video comes around 1 minute 50 seconds when a little boy (not in the screen shot) says 'I need to do a poo'. A conversation ensues between the family members and the boy, discussing where he can do a poo, and culminates with dad's joking comment, 'well, you can't do a poo in the lake'. As you can see, that brought a big smile to my face!
Key actions step-by-step instructions
Parsvakonasana, spinally speaking, is essentially a forward bending, side bending, twisting, backbend. Is that what you are doing when you practice? I deconstruct it below.
1. Sitting bones down, top of pelvis back, lengthens lower back and unsquashes front of groin.
2. Spinal forward bend. This means firming the tummy in a way you can still breathe into it. I do this by keeping top of pelvis back, leaning forward, and trying to move my hips forward without them actually moving. I lean forward without letting my butt stick up and start to take my leg back.
3. Toe down then heel down.
4. Check sitting bones down and top of pelvis back.
5. Check front thigh is rolling out. You could do this by thinking of how to roll it out. You could do it by turning your front heel out slightly so outer foot points straight ahead then try gripping the heel back in without moving it.
6. Check back thigh is rolling in. You can allow your back pelvis to also come in if that helps. In fact, these actions should help unsquash your lower back. I have outer back foot lifting towards outer ankle.
7. Stretch the ground with your feet. That means pushing the front foot down and forward and the back foot down and backward.
8. Lower ribs move back to middle back to help bring softness to your middle and upper back.
9. Spinal side bending. That means you try and move the front of bottom pelvis forward and up towards bottom side front rib. In the picture you see me drawing those two points together. Make sure the lower ribs stay back and don't pop out.
10. Take top arm overhead. Push armpits forward and up as though trying to bring your underarms towards your nose. Outer armpit is rolling towards your face. This enhances the side bend.
11. Turn from your navel level of spine towards the top pelvis. Try not to move your top pelvis or move anything else. This is just a spinal twist. Many people move the whole pelvis here but you want to make this a spinal movement.
12. Keep turning your spine progressively towards the sky. In the photo I show turning the chest. Again, try to keep this a spinal movement. Also, watch that the lower ribs do not jut out.
13. You can put your bottom arm wherever it goes without changing the preceding actions. Here is the point where many people might just collapse in their front hip in an effort to reach the ground. But in this photo you can see that I have kept the front hip exactly as it was in the preceding photo. I come to the ground with my arm because I enhance the spinal side bend. Wherever that bottom arm ends up, you don't sink into it either. I am just lightly pressing my hand into the ground and mainly doing an action of moving that armpit towards the hips to enhance the spinal side bend.
14. From there I add the last action. This is a lengthening of the front of the spine. I touched my upper chest in the photo (although the action comes from the navel). I get a little lift which sort of feels like a little back bend in my upper back. From there my head comes into place. Many people will not feel comfortable with their head in this position. It is better that you find your own comfortable position for your head and neck. My head position is throat forward, chin up, combined with a little twist where move the top ear away from the top shoulder slightly. I cannot show or explain this well here so I just suggest you move your head and neck gently and find your own comfortable spot.
15. Here I stay firm but calm. My tummy is firm but I can feel the movement of the breath there. I am content and at peace. I feel like I am doing something and I am getting warm from this posture. It is about 10 degrees celcius in this photo yet I don't feel cold even in this crop top because I had been practicing for a little while and using active movements in such a way that I tensed less, stretched less and just enjoyed moving. This is self-evident when you can see me laugh and smile as I hear the jokes of the people around me.
Difference between sinking and lifting
In this video you can see me first coming into the posture so that I do not sink into the front hip. In the second version I just sink into the front hip.
In the second way I do not do spinal side bending. It is more just hip flexion. Because of this I feel very passive. I am not getting warmth and I am not moving energy through my spine effectively.
Ultimately how you come into postures is your choice.
Be happy and content. Practice safely, mindfully, and peacefully. When you practice like this people want to be around you. You inspire movement in others. As I was filming these sequences today I had at least 4 strangers come up to me, including two children who just wanted to do tricks with me (handstands and arm balances), all wanting to talk about what I was doing and how it just made them feel good. I am certainly not the most elegant, strongest, most flexible person. But I really enjoy doing what I do. Happy with where I am. When that happens I do believe you can have a powerful influence on helping others towards finding their own inner happiness too.
This is the type of thing I teach in classes, workshops, and retreats in Canberra, Sri Lanka, and Bali. Hope to see you somewhere soon!
A handstand is an arm balance. The foundation of the arm balances I do is the high plank.
If I was super strong I could transition from my high plank to bakasana then to a handstand. But I am a bit weak.
Not all high planks are equal. Some will not teach you the requisite postural firmness you need for better arm balances.
In this post I show a video where I give some of the fundamentals of the high plank that I do that changed my practice phenomenally and helped me to develop into this handstand.
Watch the video first to see the movement in action. Then follow the step by step instructions. I have written about bakasana before so you can also refer to that post (bakasana on a block).
Do not do anything that hurts. It is better to practice with a teacher.
Get Set
Come onto your hands and knees. You need to make sure you are using your hands properly so you don't feel sinking into your wrists. This means pressing with your fingertips, feeling as though you are trying to grip at the floor or make fists. Imagine there are little holes in the ground like a tenpin bowling ball that you are trying to press your fingertips into to lift up the ground.
Knees are behind hips. Shoulders are over wrists.
Lift ribs into upper back. Can you see how rounded and lifted my upper back is? This feeling of being broad across the upper back is important. I feel as though I am pushing the arms downwards into the floor. My shoulder blades come right around the sides of my chest.
My sitting bones go down towards the back of my knees and top of pelvis moves towards the sky to lengthen my lower back. My lower back is not arched.
The sense is the entire back of my body is lengthened. This shape is important. You will need to maintain it.
The actions in my arms are important and maintained.
I push my armpits in the direction they are facing. Here that sort of means down and back.
I push my hands down and forward--away from my knees.
I feel as though I am pulling my knees towards my hands.
I feel as though I am pushing my hips forwards towards my hands but they do not go anywhere.
You cannot really see these actions. That is what makes the practice of this posture difficult. My kneeling plank is already cultivating a postural firmness for me so that my tummy is getting firm through the posture but in a way where I can still feel that when I breathe the tummy can move.
In fact, if you look at my waist area you can see it is like I have little gills there--you can see movement when I am breathing. I am breathing a lot here! It is hard. If I could I might try to breathe less.
Lift Up
Maintaining all previous actions, I put the tips of my toes on the ground and lift my knees.
I am careful not to sag my chest or lower back.
Performed well, you should feel very firm in the tummy area without needing to actually try to firm it. It should come naturally because of the posture.
See how I am trying to be right on the tops of my toes. Not the balls of the feet. That is important.
Tip toe forward
From there I try and maintain the same actions but I just tip toe forward--on the very tops of my toes.
A common challenge as you tip toe forward is to keep the tummy firm. It helps if you keep your knees bent and stay on the tops of your toes.
I keep all the same actions from before, lifting chest up into upper back, sitting bones down and top of pelvis back to lengthen lower back, feeling as though I am moving my hips forward.
Stay or bakasana
You can just try and stay there, on the very tops of your toes, lifting your chest, firming your tummy. It is really hard!!
Or you can initiate bakasana by dropping your butt a little, lifting your knees up higher as though into your chest, lightly resting them on our upper arms.
You can stay there or, if you feel light, you can lean forward until the toes feel light and then you can pull the heels into the bottom.
You can still see my little gills breathing. That is important. I am firm but calm.
Optional extras!
I am too chicken to do handstand on a bench like that. I have not yet got the strength.
But if you have built these foundations then a handstand should get easier.
I do the same thing but get onto my tip toes and start to take one leg up.
I give a little tap...
...and up I come...
Sthira sukham asanam. Firm but calm. Summary
I have written a few posts about bakasana and even kneeling plank and plank before.
That is because they are really important!
Get a good high plank. Then keep the actions and get a good bakasana.
These will help build the foundations.
There are other poses that you can do from bakasana so that you do not need to kick up into handstand but instead float from bakasana straight up. I am still working on that one! In the meantime, I enjoy the inversion with free spine.
This is the type of step by step approach to movement and posture I use in classes, workshops, and retreats. You are welcome to join me any time!
Moving to trikonasana from ardha chandrasana variation
In my own practice I do not come into postures the same way all of the time. Aside from moving actively, I think it is important to enter and leave posture in different ways so that you don't fall into habitual patterns.
In this sequence I enter trikonasana from a sort of unsupported ardha chandrasana and then come back to ardha chandrasana again.
The way I move requires and helps enhance stability around the ankle, knees, and hips.
If you cannot balance like this now, it does not matter, you can slide your foot along the ground.
Watch the video first to see movement in action then take a look at the step by instructions with a few key points highlighted.
It was raining as I took this video so it is a bit cloudy but we take our practice as it comes when we practice outside. In this video take I also almost overbalanced at the end but not all practice is perfect so I put this one in rather than other ones where I made no mistakes.
Now, see some of the step by step instructions below.
They are, of course, not all of the key points for this posture, but some that I am flagging in my current classes.
It is important to realise that I am rolling my front thigh (balancing leg) out in all postures and rolling my back thigh (or raised leg) in.
Establish length and stability around the lower back
From behind
I do this by moving sitting bones down, top of pelvis back, to lengthen my lower back.
At the same time I begin to initiate some spinal forward flexion in a way that makes my tummy firm but so I can still feel as though I can feel it move when I breathe.
It is important to appreciate that I firm my tummy before I even take my back foot off the ground.
Weight transferring to standing leg without sinking into hip
Transfer weight while maintaining lift
It is important to make sure you feel lift out of the hip and leg that you are transferring the weight to.
Throughout this process you need to stay lifted out of that hip joint.
Firm tummy, long lower back, and staying lifted out of the standing leg hip joint are some of the real fundamentals of these postures and the transitions.
Leaning forward and lifting back leg Maintaining all previous actions I lean forward, and keep leaning forward until it feels quite natural for that other leg to come off.
It is really important to emphasise I am not dropping into that standing hip here.
If you look at the picture you can see that I have tummy muscles active but not sucked in. That would make me tight and immobile in my spine.
Reaching the back leg out and down
The back leg keeps going out. I keep leaning my torso forward. I keep all actions I initiated in the beginning.
At this stage I am in more danger of sinking into my standing leg hip. I need to stay lifted.
Practically that means I need to keep sitting bones down and top of pelvis back, keep the thigh of that leg rolling out, and avoid jutting that hip out to the side. It is tricky but will keep you feeling light and strong in the posture.
Leg lowers, they straighten, then active spinal twist
From there I maintain all the work around the lower back, tummy, and hips and lower the raised leg to the ground.
I stretch the ground with my feet (as though trying to separate my feet without them moving anywhere). This activates my legs.
I don't take my legs too wide. Who cares? I also don't take my hand to the ground. Not necessary. Of course you can if you want to but make sure you maintain the important actions you have been cultivating.
The key spinal movement here is to perform an active twist from navel up. You can see my tummy muscles have been working but, again, they are not sucked in, which would stiffen my spine and make the active spinal movement impossible or difficult or certainly very rigid.
Bend knee, lean forward, come back in reverse
From there I make my way back to ardha chandrasana.
When you work well from your hip (lifting and not sinking) and from your tummy (firm but calm) you find that you do not need that leading hand to come to the ground.
In fact, you begin to find it is a bit of a nuisance on the ground and you feel better and more lifted with it off.
I took this video standing on a metre high block so there was no where for me to put my hand but most of the time I don't put it down anyway.
Putting your hand down to the ground will make it more likely you drop into your hip. For me, one of the main purposes of this posture is to help develop some stability around that hip joint. I think it is better to keep the hand up and toe on the ground if you have difficulty balancing.
Summary
For me this transition is a good chance to practice lifting out of the standing hip and cultivating some good balance.
I start from lengthening lower back and firming tummy then go from there. It does not matter how wide your legs are or whether you reach the ground. In fact, sometimes going wider and for the ground will not give you as much benefit.
In this video I demonstrated leg raised versions. However, you could just as well lightly slide your foot back to trikonasana, and just keep a toe tip on the ground for the ardha chandrasana variations. From there you get a good chance to practice all of the hip stabilising actions.
This approach to movement and posture is what I teach in classes, retreats, and workshops. I really look forward to sharing with you. Our Bali retreat is filling up so do get in quick if you want to join us in April!