We have been challenging ourselves beyond the high plank to bakasana and handstand of last week's post.
This week we discovered how great a pair of blocks can be to enhance strength, stability, and mobility around the shoulder and spine.
The video shows us working to a chandra namaskar variation. Some step by step instructions are below. I have skipped the half push up that we did. On reflection it is probably not ideal here.
Some of the instructions on the block might not be exactly what you do on the ground. However, the arm actions are pretty similar. When you do this sequence then do a normal down dog on the ground it will feel as though you are as light as a feather.
Downward facing dog
You can start with downward facing dog.
We put our wrist on the bevelled edge of the block and the ball of the foot on the other block.
Push down and forward strongly through the hands. Stay here, make sure you are firm but calm. No need to go further.
High plank
Then slowly move to high plank.
You want to try to avoid sagging in the shoulders or hips here. That means you need to really push down and forward with your hands into the blocks. Lift the lower ribs into the upper back.
With your feet, you also push on the edge.
The tummy needs to be firm in a way that you can breathe into it so you might just try the high plank on these blocks, rather than the whole sequence.
Legs are firm as well. Pushing thigh bones to sky.
You can stay here if you like. No need to go further.
Upward facing dog
I have skipped the push up we did. Too stressful for most. Instead, you could try up dog.
Again, you push your hands down and forward. Armpits pressing down. Strong in the legs so you do not sag.
We lowered our pelvis carefully so there is no strain in the lower back. We kept the firm tummy we had in the high plank.
We lift the chest to lengthen the front without squashing the back.
Go back through high plank and down dog.
Lunge
Step a foot forward for a high lunge.
Front foot pushing down and forward strongly. Pressing with back foot as well. Trying to keep hips raised and tummy stays firm.
You can stay or raise the body and arms.
Hip variation
From there we lowered the torso, hands to block. We turned the front foot out to the side and allowed the thigh to drop out as well.
Keep legs firm. Raise the body if you like but remember to lengthen the front without squashing the back. Do not feel squashing anywhere.
Back and do it all again on the other side
Back to plank and down dog and repeat on the other side.
Optional extra
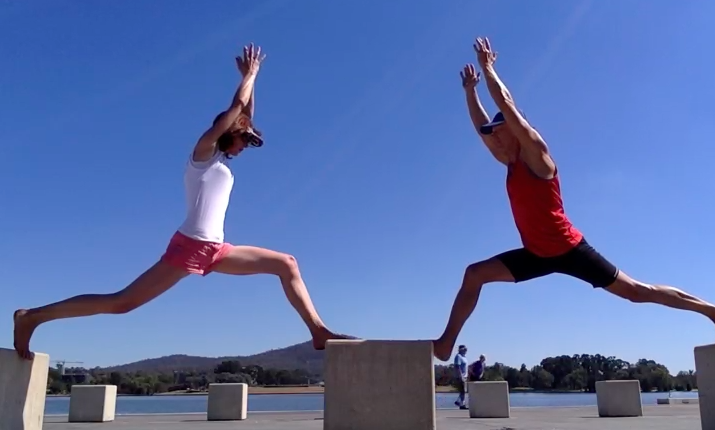
Since we were up there already, we decided to try a side split.
Make sure you try and push the feet down and feel as though you are trying to pull them together.
Ankles are firm. Tummy is firm.
The end
This was a fun sequence for us to try and enhance our practice. You can get lazy with your yoga practice sometimes and this type of practice forces you to be mindful and stable.
You cannot collapse into your flexibility here. Being between the blocks obliges you to be strong.
We tried downward dog and handstands after this. They felt light and free. Although I was pretty tired I must say!
I always recommend you practice with a teacher. Do not do anything that strains, squashes, or hurts.
The Short Of It
Every now and then I get a question about headstand, which I don't normally teach in an open class.
Headstand can bring physiological benefits but it can be harmful. This is true of most things. But we are talking about your neck so it would be wise to be cautious.
Can you do a freestanding pincha mayurasana or hornstand in absolute freedom, feeling relaxed and at ease, talking to me all the while and telling me how much you love the pose? If the answer is no, I would wait until trying to do headstand.
Pincha mayurasana is much harder than headstand. Much, much harder. But if you can do that pose freely and safely and happily then it will be easy for you to come into a headstand.
I believe that being in all poses should be effortless. When your body is ready it (the pose) will become so.
From my perspective headstand is not a pose to test yourself on or challenge your fears on or become a better person because you overcame fears and difficulties in life. Quite frankly, you can go achieve conquer your fears and challenge yourself in a million other ways that does not have the weight of your body on your head!
Read more below to find out how you can build towards the headstand safely.
The Long Of It
I was inspired to write this post after seeing students in several different classes coming into headstands when I was not there or talking to me after class about how they want to do a headstand.
The thing is, I generally don't teach headstand in group classes. I am not suggesting it is wrong to do so but there is a lot that can go wrong if your headstand is not up to scratch and until I see students confident in other poses I prefer not to.
However, I recognise that a lot of people really want to do a headstand. Perhaps because it looks pretty cool and perhaps it is a neat little trick to have in one's repertoire. Perhaps you did it many years ago and so want to be able to do it again.
But before you come into any pose it can be good to ask yourself what your intention is in doing so and perhaps find out from your teacher what their intention is in teaching you.
You probably won't find many yoga teachers telling you it is because they want you to learn a trick and look cool.
For me, the purpose of a headstand is to get inverted (with all the associated physiological benefits). I have used headstand as a type of neck releasing posture for myself as well. I also use it as a way to come into other postures--like a backbend for instance.
I don't use headstand to strengthen anything, the neck especially, as it is my belief that you should develop strength in other postures first and use the headstand as a posture to hang out and be relaxed in.
Above all, I am mindful as I practice that while headstand has so many possible benefits, it it is also a risky pose.
The reason I tend not to teach it in classes (again I am not saying it is wrong) is because I know that out of a room of about 10-20 people that there is a risk that at least one or two are not really listening to my instructions fully, or perhaps they are listening but might not be ready to fully understand them in their bodies. And I know from my own experience as a student that sometimes even when the teacher says back off if you are not ready or if you are tired there are always some of us who still forge ahead!
Knowing all of this, I then calculate the consequences of not listening or understanding or doing more than you are ready for (tipping over when your body weight is on your head and neck for instance) and, for me, the chance that even one person might suffer is not worth the risk.
I am not suggesting you give up on ever hoping to do a headstand or don't work towards it. But I would like to offer some alternative suggestions for how you can build up to the the posture safely.
I am writing this primarily for the students who come to my classes and wonder why we are not working on headstand yet but it might be useful for you to think about even if you are not my student and ask yourself whether you are really ready for it!
I am not going to tell you how to do headstand here; that is best left to practicing in the presence of a trained teacher. What I want is for you to ask yourself whether the poses I suggest below are easy and free first. If the answer is truly yes--if you can talk and breathe and relax and be happy in all of the poses I offer below--then perhaps you are ready for headstand. If so, find a teacher and try! I am also happy to offer private classes to students to work on this skill as well.
Kneeling Plank to Downward Facing Dog
Check out my previous posts on kneeling plank. The feelings in the abdomen and torso that you generate in that posture surface in so many other postures--headstand included.
With the sitting bones moving down and forward the lower back is lengthened and there is firmness in the abdomen but you should still be able to breathe into it.
With the chest moving towards the ceiling the spine is lengthened more and the muscles around the shoulder blades and chest become active without tensing.
You can try the full plank with knees off the floor, but don't lose the actions of moving the sitting bones down and forward, ribcage to the ceiling.
You don't have to be squeezing and tensing and tightening here. Go for a feeling of firmness without tension. You still need to be free to move around. Be free in the joints, not locked. Feel as though you could move and ripple through the spine, shoulders, elbows, wrists, hips, knees, and ankles if you wanted to (without actually moving).
See if you can make the transition to downward facing dog and maintain the same feelings in the abdomen and torso with freedom in the joints.
Bakasana
Build up more strength and stability through the shoulder girdle in bakasana while maintaining the same feeling in the abdomen and torso that you did in kneeling plank.
Bakasana also offers you the opportunity to be actively drawing your knees towards your chest while they are bent, which is a helpful action when you are working towards starting to take your legs up into the headstand.
I put bakasana in here for another reason too. Partly because it looks tricky and hard and interesting and perhaps you might be able to satisfy that niggling urge to do complicated tricky looking things by mastering this pose first! Remember, bakasana ultimately comes with straight arms and an ability to be relaxed and calm. Build up to holding this pose for 30 seconds to a minute and be happy.
Forearm Dog/Dolphin
The actions in the abdomen and torso you worked on in kneeling plank are also mimicked in the forearm dog posture, which you can see in my previous post on kneeling plank and in the video for this post.
This pose is hard. Really hard. Really, really hard.
It is even harder if you try and take one leg up without changing the actions in the torso. If you cannot do this pose and feel at ease and have a conversation with me then it might be best to put off your headstand for a while.
Remember that when done correctly the head is not on the floor in this pose. It does not come towards the floor either, which tends to happen for a lot of people. If anything, the head lifts further away from the floor.
Watch for the tendency to collapse the ribcage and sway the back here, essentially losing the actions that were cultivated in the kneeling plank.
The neck should be free and you can look towards your navel. If you cannot see it then you have probably sunk into your shoulders or collapsed the ribcage or are arching in your upper and lower back.
Now, while you are here, with one leg in the air and not collapsing, can you breathe and relax and talk freely? Can you feel relaxed in your shoulders and neck? If you cannot, be content with where you are and just keep working on it.
Work on it in a dedicated but kind way. This is not the time to be hard on yourself. Keep practicing, notice the small changes, and be happy with what you have done and are doing. Alternate between this and the pose below at the wall if you like.
I suggest you get a teacher to observe you practicing this pose as they will be able to help you free your shoulders and neck and let you know if you are collapsing in the spine.
Forearm Stand At Wall (pincha mayurasana or hornstand) & Free-Balancing
From the Forearm Dog you can back yourself up to the wall and see if you can maintain your actions and walk the legs up the wall to 90 degrees.
Again, remember your kneeling plank foundations. Resist doing more than you are ready for. If the spine starts collapsing (you will know because you can feel it starting to bend backwards) then go back to the forearm dog for a while.
Being at a 90 degree angle is pretty tough. You will find it seems to take less effort to be in the actual pose--either at the wall or free-balancing. But that is why it is a preparatory pose--you want your preparation to be so effective the final pose feels easy.
I suggest that you work your way to feeling confident in free-balancing in this position, first at the wall if you need but ultimately away from the wall before you try headstand. Then you know that if at any time your neck felt uncomfortable in a headstand you could push up into the hornstand to relieve any tension. You will probably need the guidance of a teacher here so don't be afraid to ask.
I also suggest that you be able to do this posture in way that feels relaxed. Well, I suggest you do all postures in a way that feels relaxed but really think about it in this one. This means you feel free to move around in the position and feel lightness rather than tension.
The thing is, if you are going to fall from a headstand--which you should be open to--then you want to be relaxed about it rather than falling from a rigid and stiffened body. I liken this a bit to what happens to really drunk people. Have you ever seen a really drunk person fall over? They are relaxed and like rubber and probably less likely to break something than the same person who falls with limbs and spine rigid. Not that I am suggesting we all turn to drink--you can relax without drinking.
This all takes time. Be patient. Be happy with where you are rather than unhappy thinking about where you want to be.
Throw In Some Side Bending & Twisting
You can also work on some side bends and twists. Both types of poses--when initiated from the navel up--will help move your spine. They will be especially helpful for people who feel like their elbows keep splaying out in the hornstand/pinch mayurasana.
Side bends will help lengthen the side of the body from the hip up through the armpit and into the arm. A lot of people are tight around there. Bending sideways can help free up the spine as well as the hips and shoulders. See my previous posts on 'A Way to Parsvakonasana' and 'A Way To Sidebending'.
Summary
Headstand is a wonderful pose to do but I'd suggest only doing it if you know you have no neck issues and you are confident you can at least to do horn stand or pincha mayurasana in absolute freedom and ease away from a wall. Then you can be assured that you have the requisite strength, mobility, and stability around the shoulders.
For me, headstand is not the type of position you want to see as a challenge. It should really be the natural consequence of being able to do much harder positions.
I wrote this post as a guide only and nothing beats the careful attention of an experienced teacher. Perhaps rather than practice any of these things on your own you can bring them up with your teacher when you next see them.