Showing posts with label downward facing dog. Show all posts

Tuesday, 6 August 2013

A Way To Downward Dog To Free Your Spine


Do I start every post with the phrase "there are many ways to do the same pose"?  Well, it might be boring but it is true.

Remember that I offer suggestions on a particular way to try poses because I believe they offer a way to bring freedom but they are not the only way to practice.

This week I want to offer a way to think about downward dog that I suggest you explore in my classes.  Rather than go into fine details about the entire pose,  I am going to focus on a specific part of the pose--what you are doing around the ribs, chest and armpit area.

I will also show you a variation that you can practice at the wall to create more freedom around the upper back and armpit area.

This variation will especially help those of you who feel your arms are 'too short' to come into pincha mayurasana or whose arms are too weak to help you into urdhva dhanurasana.

In my experience, it is not limb length or strength that makes those poses difficult but tightness around the outer armpits that prevents you from taking the arms overhead with a free spine; which is precisely what you want to practice in a pose like downward facing dog.


Background
If you just want the technical stuff then skip this bit.  You might have guessed that I am one of those people who LOVE reading the author's footnotes and endnotes, often more than the main text.  So, I'd like to meander a bit here to share with you how the idea for this post emerged.

A few weeks ago an inquiring student asked me why she another yoga teacher came and pushed her chest to the ground in downward dog when I was suggesting in my class that she gently soften the ribs towards the spine.  Obviously that was confusing since we seemed to be suggesting the opposite movements!

My first advice to her was to ask why the other teacher might be doing that, as teachers always have a reason and will be able to tell you their reasons.

My second words were that while I might be suggesting something else it does not mean one way is wrong or right, but that they are different and she needed to explore for herself what felt better at a particular point in time (bearing in mind our bodies are always changing).

These are really important messages.  Ask why and then explore what feels right.  Seeing this attitude in students always makes me happy.  You don't come to yoga to make me happy, obviously, but I am altruistically happy in this regard because I know that with an inquiring, exploring attitude you will eventually find your own way to freedom.

While I was chatting to her about this it also reminded me of another student who, many years ago,  asked me to teach the class exactly how to do downward dog because he had read somewhere that if you can master downward dog then you have mastered yoga.  As a relatively novice teacher  I mistakenly believed there was only one downward dog (of course it was the one I had learned!).  I wouldn't say I am wiser but I now know better.

Having said that my downward dog is still pretty much the same as it was then, mainly because I had the same genius teacher back then that I have now (Paddy McGrath if you haven't googled her yet then please do).

Purpose
You don't have to get all theoretical about yoga but it can help your practice if you have an idea about what you might be doing in a pose.

My purpose is always to look for freedom in the spine.  I have invented a new adjective to describe this way of freeing your spine--'spongify'.

In all of my poses I try to feel like my spine is a sponge so that at any time I could squeeze it in any place and it would be soft and spongey.  And if I came up to you while practicing and tried to 'grab' a piece of your spine (which my students will have experienced) it would feel spongey and not hard.

It is a beautiful experience to have this spongey spine and you will not get it if you stretch too much or tense too hard, so bear this in mind.

Physiologically, when you can let your spine be free you will enhance the flow of energy and information through it.

Aside from cultivating freedom in your free spine, you can also try to create length in your outer armpit muscles by practicing the way I suggest.  This will help you take your arms overhead without projecting your ribs forward so that the spine stays long rather than compressing in poses like urdhva dhanurasana and pincha mayurasana (or any pose where you need to take your elbows near your ears).

The Ribs
What to do with the chest in downward facing dog?

Because a lot of people think yoga is about stretching, and perhaps because many yoga journals and articles tend to print pictures of very flexible people, you might think that pushing the chest through towards the ground is what you should do with it in downward facing dog.

It is not wrong to push the chest through, sometimes I do this briefly myself and it usually gets a crack or two out of the thoracic vertebrae.  But, for me, if I hold myself in the pose like that it just feels like squashing the back of my spine and jamming up my shoulders.

What feels better is if I gently soften my ribs towards my spine--as though they are floating towards the ceiling.

The key is not to push the ribs back or you will go too far the other way--instead of shoving the chest through you end up shoving them back.

As in most things the middle way often bears the most delicious fruit.

What I suggest you look for is a place where you can wave the spine around.  You will see me doing a lot of that in the video.

The Armpits
With a free and spongey spine see if you can think about pressing the armpits downwards and inwards as though they are trying to move towards your inner thighs.

This firms the armpits in a lengthened position and will help cultivate strength and flexibility that will help you in other postures where you need to take your arms overhead.

Some Adjustments
To get a free and spongey spine you might need to make a few adjustments to your downward facing dog.  Some of the most common ones you can try are:

  • bend the knees a little and worry less about getting the legs straight.  This is especially if the back of your legs are really tight.  
  • take your arms a bit wider than shoulder width.  Sometimes this can help if you are already really tight in the armpit or across the upper back.


Summary
Downward dog is a pose that gets repeated a lot in yoga classes.  For me each downward dog is a great opportunity to to give my spine a good wiggle.  Actually, I wiggle my spine in each and every pose but this is a semi-inverted pose that helps it wiggle in a different way.

To get your spine waving, see if you can find a way to soften your ribs towards your spine.  Then, to help create strength and flexibility in the armpits to better backbends and inversions (by better I mean spine-freeing) practice pressing the armpits down.

Remember, if it doesn't feel good then it probably isn't.  And don't be afraid to ask your teacher to give you a hand.

May your practice be peaceful, safe, and joyous!


Thursday, 6 June 2013

A Way To Kneeling Plank For Better Arm Balances


Down dog, plank, crow and the forearm balance pincha mayurasana are all much the same pose.  The main difference is the angle of the arms relative to the torso and angle of the hips.  From my perspective, and current way of practicing, the spine stays much the same--long and free.  

In these poses, the abdomen is also made firm.  However, it is made firm by the posture not because you are 'sucking in'.  In this way of practicing there is no need to actively pull navel to spine and you can breathe into the belly.  It won't move too much because it has been made firm by the posture (if performed correctly) but the act of breathing into it will help give you power and relaxation.  Please link to Simon Borg Olivier's work on this matter if you are in doubt.  Also, watch Paddy McGrath as she practices (you can google them both).  You will see how long and free her spine is as she moves between postures like this.  

These issues--length and freedom in the spine along with firmness in the abdomen created by the posture--are important things to consider when 'looking' for a feeling in the postures I describe below.  

You will see that kneeling plank, when performed as described, is the foundation for all of the poses. 

You will see also that kneeling plank, when performed as described, is a fairly difficult pose.    

If you can manage a great kneeling plank, as described, then you will create firmness in your abdomen without needing to pull your belly in. The type of firmness that is combined with ease and will enable you to gracefully come into more challenging poses rather than rely on brute force.

You will cultivate strength, stability and openness around the shoulders without needing to lift weights.

You will find length and freedom in your spine without over mobilizing weak parts.

Here is how. Before you begin, revise my previous posts on using the hands as I will only highlight the main points.  Remember do not try anything that might make you uncomfortable. Move mindfully and back off if there is any discomfort.  This is a way to come into these poses.  I like them because they make me feel firm but free, strong, but relaxed. There are other ways.  Find what works for you.


***note that the 'ambient' noise in the background is because I didn't figure out how to get rid of the noise of the person boxing in the gym where I filmed this!


Kneeling Plank
Come onto the hands and knees. Middle fingers point straight ahead, hands a little wider than shoulders.  Claw the fingers as though making a fist. Squash the wrists towards one another, roll the underside of your arms towards your face. Elbows straight but not rigidly so.

Knees slightly behind hips. 

Breathe into the belly.  Let it bloat out like a baby's belly.  You will keep breathing into the belly throughout.

Scoop the sitting bones down and forward as though they are moving towards the wrists.  Lift the top of the pelvis towards the ceiling. The lower back should lengthen and now the belly will firm without you needing to think of actively tensing it.  

Breathe into the belly.

Child's Pose (Balasana)
Beware the tendency to just sag back and let the chest and lower back give way to gravity.  The chest still floats up, the sitting bones move towards the wrists.  

Press the armpits in the direction they face--now towards the floor. 


Feel as though you are pulling your knees towards your wrists.  

Push the ribs and chest up towards the ceiling.  The upper back will broaden.  Push the arms down into the floor to enhance this.

Lightly move the armpits in the direction they face--back towards the knees.

Relax the face and neck.

Breathe into the belly.

From kneeling plank you can move to balasana by shifting the whole torso and pelvis backwards towards the heels.  You don't have to sit on the heels.  

Downward Facing Dog (Adho Mukha Svanasana)
Keep the actions you have been cultivating in kneeling plank and then child's pose.  The only thing that changes now is that the heels start to press backwards, as though to the floor.  They might not reach the floor. Who cares? It is not that important.  The legs might not straighten. Who cares? It is not important.

What is important is that the foundation you have set--ribs floating up with lower back long--is maintained.

To ensure you can do this, move slowly.  If you find yourself starting to sag in your spine then pause.  Back off until you are not sagging.  Stay there and be content with where you are. Let's use this pose to free and lengthen the spine rather than worry about straightening the legs.

Many people, if not mindful, will push their ribs through towards the floor. Perhaps because a lot of people are photographed doing it and because it feels more stretchy.  I am not saying it is bad to feel stretchy.  However, the action of pushing the chest through rather than lifting it up will teach you nothing about the more advanced arm balance poses.

Crow (Bakasana)
Bakasana is basically a variation of kneeling plank but with the knees on the arms.  The actions of pushing sitting bones to heels, pushing chest upwards, pulling the knees into the chest, and pressing the armpits in the direction in which they face.  

The main difference is that the knees actually move towards the chest rather then just feeling as though they are. 

Lift up on tiptoes, place the knees on the upper arms, keep trying to pull the knees up higher, push the sitting bones towards the heels, armpits to waist, chest to sky.  

You will feel when. You are ready as you will be able to shift your weight forwards and float up.

Forearm Stand (Pincha Mayurasana)
From down dog, lower to your allows, again without letting the chest or lower back sag. Sitting bones to heels, top of the pelvis back, ribs float towards spine. Head hangs down.  You should be able to see your navel.  If you ribs poke out or drop you will not be able to do this.

This pose is really tough.  Most of us just need to be content to stay here on our elbows for a while, navel gazing.  The most common things that happen here are that the chest sags, elbows splay, and shoulders start to drop into ears. 

If these things start to happen then try to rectify them and, if you cannot, go back to kneeling plank and down dog, every now and then coming back to Pincha Mayurasana to see if you can maintain the position without losing the foundations you have set.

Summary
The lower back is lengthened by moving the sitting bones down and forward towards the wrists, top of pelvis up to the sky.  

The middle and upper back are lengthened as the ribs and chest move back towards the spine or ceiling.

The armpits press in the direction they face.  

The posture creates firmness in the belly.  Don't try to pull it in.  Breathe into the belly.

Relax the neck and face.  

Be content.  

Remember, move slowly.  If anything does not feel good, back off or don't do it.  

May your practice be safe, peaceful, and happy. 


Classes (current at time of posting.  See class schedule page for updated details):

Mon 1300-1530h @ Barton [private classes]

Wed 0615-0715h @ Hapkido Canberra, Colbee Court, Phillip, ACT, $12

Wed 1030-1130h @ Alive! Gym, Narrabundah

Wed 1245-1315h @ Menzies Library Lawn, ANU, $5

Sat 0900-1030h @ St Aidan's Uniting Church, Brockman St, Narrabundah, $15

Sun 0900-1030h @ Hapkido Canberra, Colbee Court, Phillip, ACT, $15


Friday, 22 February 2013

Handy Work, Part 2: Protecting the Wrists in Hand Balances

Generate stability and lift with good hand technique


The Short of It
Bearing the weight of your body (either partially as in down dog or fully as in balances like handstand) requires you to use your hands in a particular way.  The best way I have found that brings stability and creates lift is as follows:


  • place the hands on the floor, middle finger roughly pointing straight ahead with fingers spread
  • hands are flat on the floor but make an action as though you are trying to make a fist with your hands or as though you are trying to pick up the floor.  The fingers might start to claw a bit (good) just make sure the fingertips stay pressing and the mounds of the fingers (beneath the knuckles)--especially at the base of the index finger--keep pressing down
  • attempt to squeeze the wrists inwards towards one another while also attempting to press the knuckles away from one another.  The action is like you are trying to screw the right palm clockwise into the floor and the left palm anti-clockwise into the floor

The Long of It
In my last post I discussed some of the basic movements at the wrists and fingers and how combining movements can bring stability and freedom to the wrist joint as well as either pull energy (blood, nutrients etc) towards the hand or push it away.

Based on the work of the yogis at Yoga Synergy I tried to show how you can create a bandha around the wrist joint complex to do this.

A bandha (around the wrist known as mani bandha) is basically co-activation of opposing muscles around a particular joint.  In this case, opposing muscles might mean activating muscles that flex the wrist (bring palm closer to forearm) while at the same time activating muscles that extend the wrist (back of hand moves closer to forearm).

While it might sound tricky to flex and extend the wrist at the same time it is made much more simple because many of the muscles that flex the fingers also flex the wrists, while many muscles that extend the fingers also extend the wrists.  This means that you can create this co-activation by either trying to flex the wrist and straighten (extend) the fingers or extend the wrist and flex (curl/bend) the fingers.

In the last post I focussed mainly on how to create these co-activations (bandhas) when the hand is not supporting the weight of our bodies.  However, creating mani bandha is vital to maintaining the integrity of your wrist joints when you place them on the floor and bear weight through them.

It is really important to learn how to bear weight through your hands as there are many simple yoga poses that have us on our hands.  Most new students will end up with sore wrists (and so will many of the oldies if they don't work mindfully) if you do not use the muscles of the hands and forearms properly.

In this post I will show you some tips for maintaining the integrity of the wrist when you place your hands on the floor.  For more experienced practitioners you might find that a few little tweaks using these tips will help you lift higher into some of your arm balances as well.

Alignment & Force Transmission Through the Wrist
You have two long bones on your forearm--the radius and ulna.  As these two bones get closer to your wrist the radius gets wider and the ulna gets thinner.

The bone on the thumb side of the forearm (radius) is thicker  towards the wrist, while the other bone (ulna) is narrower towards the wrist.  The opposite is true at the elbow.  
These two bones cross over one another when you pronate your forearm (turn the forearm so that the the underside faces down as it would be in typing or doing down dog or handstand).  They uncross when you supinate (turn the forearm so that the underside faces up as though to look at the palm of the hand).

The fact that one bone is thicker at the wrist end has important implications for bearing weight through your hands.  It means that force transmission from the forearm to the wrist happens mainly on the radius side (thumb side) of the wrist.

In fact, 80 percent of force transmission from the forearm to the wrist is through the radiocarpal joint, which means you should place most of the body weight on the thumb side of the palm while you co-activate the muscles of the forearm (Borg-Olivier and Machliss, 2011).

You also need to make sure you have aligned the wrist properly for the best force transmission.  The axis of movement of the hand runs in a line through one of the small bones of the wrist and out through the middle finger.  What this means is that when you place your hand on the ground you want an alignment of the middle finger pointing straight ahead.

Stretching or spreading the fingers will help give you a wider base of support as well as more actively engage the muscles of the hands.

What this all means: When placing your hand on the ground, align your hand with the fingers spread and the middle finger pointing roughly straight ahead.  More weight should be on the thumb side of the wrist than the baby finger side.

Ha-mani bandha
Now, just placing your hands in correct alignment is not going to save your wrists from feeling compressed (although it is a good start).  What you will need to do is simultaneously co-activate muscles around the wrist joint.

When the hand is outstretched on the floor about to bear weight the best type of co-activation is ha-mani bandha.  This is where you extend the wrist and flex the fingers as though you were trying to make a fist.

Think about this one carefully.  It is one of the yoga tricks of the trade.  While the fingers look like they are extended (they are), the action you are trying to create is the opposite--of flexion.  And when I say 'make a fist into the floor' you won't actually be able to do it.  The floor is stopping you.  But the action persists.

Different people have different instructions for creating a ha-mani bandha.  Instead of thinking about making a fist, you could try to imagine your hands are like suction cups, pressing down through the fingers, the outer edges of the palm, and through the base of the knuckles but sucking up at the same time.

Another visualisation I often come back to is to imagine you were trying to pick up the floor or imagine you were picking up a basketball one-handed from the floor.  Basically, whatever helps you to extend the wrist while at the same time activate wrist/finger flexors.

Imagine trying to pick up the floor or a basketball. You'll have to spread the fingers and press down through the fingertips while sucking up at the same time. 


What this means: When placing your hands on the ground for weight-bearing work, you need to try to 'flex' or bend the fingers to give the wrist stability.

Finishing touches
Having aligned your hand correctly and cultivated ha-mani bandha by trying to make a fist/pick up the floor/flex the fingers, you can bring stability to the elbow and shoulder and create a greater sense of lift by using another trick.

When the hands are on the ground try to squeeze or drag the wrists closer to one another.  They will not actually move because they are pressing down on the floor.  However, the attempt will trigger muscles around the elbow joint to become active, bringing more stability to that joint.

You can also imagine that you are trying to screw the right hand clockwise into the floor and the left hand anti-clockwise.  This has a similar effect but a different visualisation might help.

Summary
In summary, whenever you place your hands on the floor, do so mindfully.  Use the following tips to help you bring a greater sense of stability and to help generate lift.

  • place the hands on the floor, middle finger roughly pointing straight ahead with fingers spread
  • hands are flat on the floor but make an action as though you are trying to make a fist with your hands or as though you are trying to pick up the floor.  The fingers might start to claw a bit (good) just make sure the fingertips stay pressing and the mounds of the fingers (beneath the knuckles)--especially at the base of the index finger--keep pressing down
  • attempt to squeeze the wrists inwards towards one another while also attempting to press the knuckles away from one another.  The action is like you are trying to screw the right palm clockwise into the floor and the left palm anti-clockwise into the floor
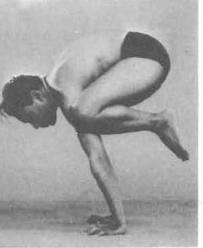
Take a look at BKS Iyengar's hands in the following iconic images of him in poses like bakasana and it's one legged counterpart, as well as in handstand.


As always, don't just take my word for it (well, it's not really my word but the words passed to me by my teachers).  Try it out. Right now if you can.

Hopefully you found your whole arm became more stable. As always, if you feel compression or discomfort then back off or stop.  If you continue to experience wrist discomfort then talk to your yoga teacher for appropriate modifications.

Otherwise, try using these instructions in a variety of postures where the hands are on the floor.   Of course, the hands are not the whole picture in any posture when the weight is bearing through them.  Yoga is an integrated, whole body practice.  You'll need to be mindful with regard to the rest of your body, in particular the elbow and shoulder joint complexes.  Look out for more posts on these areas.

Happy and safe practicing.