Friday 27 March 2015

Tummy and Armpits: How To Practice Some Key Actions of Handstands Without Your Hands


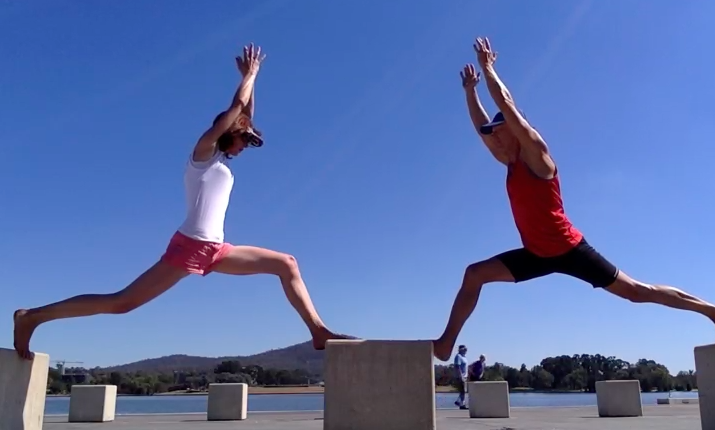
Even though handstands and arm balances feature in most of my sequences, not all of us can do a handstand.  Sometimes, for whatever reason, we might not be able to put our hands on the ground either.

But all of us can learn some of the key actions of a handstand without putting our hands on the ground.  

In this post I share a video and some instructions about some of the key actions that you can cultivate so you are still working towards similar 'anatomic' actions.  

You could take this option when it gets to an arm balance section of the class and still be doing amazing energy moving work.  

Have a look at the video to see the movement in action, then take a look at how I have tried to deconstruct the steps. 


Soft Tummy
One of the keys here is to be able to have a soft tummy.  If you cannot relax your tummy then you very likely may not create the correct firmness in the tummy when the time comes to do so.

Digging fingers into soft tummy to show it is soft

This is trickier than you might think.  Most people find it really difficult to relax tummy muscles.  It can be for many reasons.  One of the key ones I have come across is the perception that we should be sucking our tummy in and walking around with sucked in tummies as much as we can.  

Be aware that if you cannot relax your tummy muscles, you are putting fairly constant pressure on the contents of your abdomen, including your bowels and reproductive organs.  This can impact on the functioning of the digestive and reproductive systems.  

Anyway, just a thought.  

So, step one is to relax your tummy completely.  In the photo and video I try to show this by digging my fingers deep into my tummy so you can see it is not hard. 


Lengthen lower back
In general I start many postures by moving my sitting bones down, top of pelvis back in order to lengthen my lower back.  

I took my arms overhead in the photo/video so you could see what I am doing.  It is also a nice thing to do to enhance the length of the back of spine.  

I am not doing this action by tensing my tummy.  There is a little lower abdominal internal activation but generally the tummy is very soft still.  In the video I dig my fingers back in my tummy to show this.  

Push hips/sitting bones forward without moving legs forward


This is tricky.  You try to push your hips/sitting bones forward without moving the legs forward. 

If the legs go forward you don't get the firmness in your tummy.

If the legs remain as much as possible where they are then the tummy goes firm.  

In the video you can see that I push my fingers into my tummy after this and they cannot go in.  It is firm.  I try to show this below as well.  

My tummy is firm in a way that I can still breathe freely and feel as though the movement of the breath could go there.  

If you watch my arm balance videos where my abdomen is exposed you can sort of see that my breath is still going into my abdomen area (looks like I have gills!).

This is not sucking in tummy.  If you slow the video down where I push hips forward you can see that  I am not sucking up.  

Push armpits down and forward
Push the armpits down and forward.  

In the video I show how this firms the front and back of the armpits.  


My tummy is still firm.  

The movements I do in the video are really exaggerated and jerky.  I was trying to emphasise what I was doing.  If I did my own practice these actions would be much more subtle.

Alternate firming of armpits and tummy
Because I have been practicing these activations for a while, I can do them as shown.  I showed this way more for the video so you could see what I am doing.  

If you are learning this, most people will find getting armpits and tummy firm easier if they try putting the arms on the thighs as shown in the picture below.

If I was in a class, I would be encouraging people to use this method as pushing the hands against the thighs helps prevent them from coming forward when you push the hips forward.  Also, it is easier to get some armpit activation for many people if the hands have something to press down against.  

In class I usually do the demonstration as shown in this photo and get people to feel what is going on.  

Stay or take these activations to the ground
These two activations are key components (but not the only ones) of many postures (?most) where you are weight bearing through the arms.  

If you don't want to or cannot put weight through your arms for some reason then you could be doing this and really feel like you are doing something.  You could do it from kneeling if you want as well.

If you can, you could try to take these activations to the ground for plank, kneeling plank, bakasana, or even a handstand.  


But remember, your life will not be any better just because you can do a handstand!

It will probably be better if you can learn to relax your tummy completely then learn to activate it when you need however!

Don't do anything that hurts.  Be alert to over practicing and how you feel the next few days whenever you introduce new practices.  Have fun.  Laugh.  Smile.

Happy and safe practicing.

Some simple energy moving sequences: You don't have to do the big stuff to feel good

Small parsvakonasana

I can do some tricky things in my yoga practice (though there are others who can do so much more).

I have gone through a phase of sharing some of these 'bigger' things.  But I don't want to be misleading.

I do those things some of the time.

Other times I choose to do 'smaller' things.  I have two videos showing these 'small' variations here.

I do tiny trikonasana, tiny parsvakonasana.  Everything tiny.  I still move actively, but just minutely.


I wanted to post these less complex variations of some of the postures in the sequences I teach so you can see for yourself what I often do in my own practice.

I was also inspired to post these because I have had several conversations over the past few weeks from people recovering from illnesses or injuries and who might think they cannot do yoga or who sometimes come to class trying to do all of the big stuff they did before.

I always try to model what I teach.  I practice when I am sick.  I have practiced when I have had ailments.

Only a few weeks ago I taught class about an hour after having dental surgery (scheduling mistake not deliberate!).  I was experiencing dizziness and balance disturbances.

I still taught and practiced.  But, mindful of my condition on that particular day, I practiced within my capacity for that moment.  That meant I did not go upside down and did the smaller versions of postures.

It is so important to shape your practice in accordance with what is going on in your body and mind on a particular day.

There is no shame in going small.  I feel really great, maybe even better, when I just do the simplest, mindful variations of postures.  Some days I teach 4 hours of yoga in between a full-time job.  While I could do the big postures, I always know I will feel better if I just do the small ones.  So I do (practice small).  And I do (feel better).

I hope you might as well.

The first sequence above shows some standing postures.

The video below shows a standing balance, spinal movement sequence.  Actually, I posted that one mainly for the entertainment value of watching the car pull up behind me around 1m 30s and pause and just stare.  Then, around a minute later it pulls up again.  Eventually the guy winds the window down and asks what I am doing.  I say yoga and he can join me if he wants but he just drives off saying he is not flexible.  This was hilarious to me for many reasons but mainly because I am not doing anything that looks like you need flexibility at all.   Basically, if you can stand you can probably do what I am doing (with more or less of your toe tip on the ground).


Anyway, happy, safe, and small practicing!


www.yogacafecanberra.blogspot.com
www.artofliferetreats.com
www.yogacafelk.blogspot.com

Saturday 21 March 2015

Backbends Without Squashing


I have written about armpits many times before.  There are more things to talk about with regards to actions at the shoulder joints but the armpits are so key and I have focussed on them in our course.

One of the key things to appreciate is that how you use your armpits, depending on shoulder position, can impact on the spine.  If you take your arms overhead, I take armpits forward and up and NOT down and back.

In an overhead position armpits forward and up will help create length in the spine.

If you take them down and back while arms are overhead, or even down, you get a shortening feeling around your sides and back.

To come into more difficult postures where the arms are overhead you need to free up your armpits so the spine can move freely.

Some backbends happen with the arms below shoulder height, like ustrasana or bhujangasana for instance.  In those types of positions, because arms are not overhead, I take armpits down and back.  The video below shows how I can do backbends with armpits down and back, as I would in backbends like bhujangasana, or forward and up, such as I would in urdhva dhanurasana.

In the video I also show how you can actually come into a pose like urdhva dhanurasana with armpits either towards ears or with armpits towards hips.  I do this to illustrate a point that it can be done, not necessarily that it should be done.


As I show, because I have a fairly fluid spine it does not create difficulty for me to come into an overhead backbend like urdhva dhanurasana with armpits down.  But it does not feel as good as it could either.

The thing is most people (either coming to yoga or not) tend to be stiff in their spine in general, and move most from their lower back.

Doing urdhva dhanurasana with the armpits to the hips (downs and back) can reinforce the shortening many people already experience.

So, in my classes I encourage armpits to ears to generate the length in the spine.

Again, because I am fairly mobile around my armpit area, especially when I take them overhead, I can easily come up into a full backbend with armpits to ears.

People who are tighter around the armpits will find that they cannot come up so easily and I suggest you only come up to the point where you feel at ease in your spine.  This might mean the shoulders barely come off the floor and you just lift a little, as I also show in the video.

These are not things to practice without the guidance of an experienced practitioner so I encourage you to go to one.  I would encourage you to feel in your own body what is going on and if you come out of a backbend with a sore lower back to question what has gone on to create that as it should not be squashing.

In our classes this week we also looked at some of the basic movements at the shoulder joint--shoulders rolling in and shoulders rolling out.  We looked at how these movements can cause associated movements in the upper back (thoracic spine).  We looked at how these associated movements can be over-ridden if we call attention to them.

For instance, rolling the shoulders in tends to cause the upper spine to round as though bending forward.  We can try to lift the chest softly to help bring the spine back to upright.

When rolling the shoulders out it tends to cause the upper spine to arch as though back bending but that we can also over-ride this if we are conscious of it by softly drawing the lower ribs in.

Understanding these associated movements will help you learn to move your spine independently of shoulders for better and more active spinal movement.  I will post more about this later.  The armpits are a lot to think about already!

I had to laugh at myself when I re-watched the video.  I am not sure how my voice turned into a David Attenbourough-esque commentary.  Perhaps it is because I feel so wonderfully passionate and when that happens and you try to explain something it does something funny to your voice.  Well, to mine anyway,  Also to my eyebrows!

We will practice these actions in my classes, workshops, and retreats in Canberra, Colombo, and Bali.   I'd love to have you along.

Great work all.  Happy and safe practicing.

Much metta,
Samantha

Sri Lanka Yoga Retreat, July 16-19, 2015


This is much more than a yoga retreat.

Over 4 days I will lead us through a series of twice daily yoga classes designed to deepen your understanding of movement, enhance body awareness, and help you understand how it is possible to practice more challenging postures with greater ease and less effort.  

I teach active movements and emphasise free spinal movement as essential to the practice of posture. The environment is relaxed and friendly.  

Each class will be a combination of workshop and flowing practice so that you leave feeling as though you have both learned and done something.

We will have the opportunity for meditation practice in the morning for early risers.

Amazing Sri Lankan food will be prepared for us--much of it sourced locally.

In between sessions I also make myself available for discussion, to help you refine your technique or practice some skills so you can make the most of our time together.

Check-in Thursday 16th July 1 pm - Depart Sunday 19th July after breakfast by Noon

Venue: Talalla Retreat  http://www.talallaretreat.com/

Classes: Six 2 hour classes. First yoga class starts on Thursday afternoon at 4.30pm.  From then we will have 2 classes on Friday, 2 on Saturday, and 1 on Sunday.  

Aside from the usual yoga there is the opportunity to relax by the pool or at the beach, surf, get a massage, or just hang out.

Because there are limited rooms I am encouraging people to please consider sharing so that as many people can participate as possible.    Rooms need to be confirmed with full payment received.  In case you have to cancel, a full refund can be provided up until 16 June 2015.

The rates quote below include:
   All yoga classes
   Full board (tea/fruit before yoga; buffet style breakfast served at table; a la carte lunch (there is a menu to choose an item from), buffet style dinner)
   Accommodation

You need to pay for any extra drinks or snacks you might have if the mega breakfast and dinner and light lunch still leaves you hungry!  

Timetable
Normal timetable is as follows

MORNING
6.30am                 tea/fruit (if desired)
7.00-9.00am         yoga
9.00                      breakfast

RELAX                  (have massage, swim, surf, read, have lunch around 1 or 2ish depending on how full you are after brekkie)

AFTERNOON
4.30-6.30pm         yoga
7pm                     dinner

The prices quoted below are based on 3 nights per person.   You need to find a person to share with if you opt for double or triple and Tilak can put you in touch with other people who may also want to share.  

Payment
Full payment is required at time of booking.  You can make your booking directly with Tilak (tilak@antsglobal.lk +94-773-912-100) and pay  Tilak directly or he can provide a Sri Lankan or Australian bank account details for you to transfer to if that is easier.


Retreat Rates
Sri Lankan citizens or with those with a Sri Lanka Resident visa:
Single 3 nights                   Rs. 50,000/-
Double (share) 3 nights     Rs. 39,000/- per person
Triple (share) 3 nights       Rs. 36,000/- per person

Non-Sri Lankan citizens without a Sri Lanka Resident visa
Single 3 nights                   USD650
Double (share) 3 nights     USD560- per person
Triple (share) 3 nights       USD530- per person


Look forward to seeing you!

Much metta,
Samantha


Friday 20 March 2015

Flying Shoulderstand


For those who are friends with me on Facebook, you will know all the jokes about my skinny chicken wing arms and long skinny lobster claw hands.  I am trying to be able to do some strong arm balancing things, including handstands, with those chicken wings/lobster claws.

One thing I do not want to use to help me with my handstands is the wall.

That means I need to look for a few other interesting variations.

So, here I am exploring ways for skinny arm girls to get strong.

A few weeks ago I popped up a post of us practicing yoga on top of some blocks.

Boy, that helped my skinny arms and tummy get strong.

Then I looked over from the blocks.  These bike racks hang out near where I hang out and so I thought I would see if there was a way for us to hang out together.

I tried a few push variations with me on top and pushing down with my armpits to bring my knees to chest.


Then I realised I was finding a lot of things to push on but was there a way to get some pull action going on.

It lead to the upside down variation of shoulderstand, which I have called a flying shoulderstand, and you can check it out in the video below.


This gave great pull action around the armpits and also I tried to minimise momentum and use my tummy muscles to help me move around and into and out of the posture.  I am actually pretty weak so you can see a little swing here and there.

I think this would be better if I were higher off the ground so I could try and let my neck be a bit free but I had to make do with what was available.

I did not want to put my head on the ground and I don't recommend anyone even try what I am doing without some supervision.  If you are not strong enough you would fall on the back of your neck and that is obviously not good so I am not advising go out and do this at all or unthinkingly.  This is mainly for my students and safe practitioners.

Hmm, wonder if we will find some bike racks in Bali for our retreat?  Maybe I need to run and outdoor urban street furniture yoga workshop here in Canberra soon?

Happy and safe practicing!

Much metta,
Samantha

www.yogacafecanberra.blogspot.com
www.artofliferetreats.com

Saturday 7 March 2015

Yoga On A Block For Strength, Stability, and Mobility


We have been challenging ourselves beyond the high plank to bakasana and handstand of last week's post.

This week we discovered how great a pair of blocks can be to enhance strength, stability, and mobility around the shoulder and spine.  

The video shows us working to a chandra namaskar variation.  Some step by step instructions are below.  I have skipped the half push up that we did.  On reflection it is probably not ideal here.  

Some of the instructions on the block might not be exactly what you do on the ground.  However, the arm actions are pretty similar.  When you do this sequence then do a normal down dog on the ground it will feel as though you are as light as a feather. 

Downward facing dog
You can start with downward facing dog.


We put our wrist on the bevelled edge of the block and the ball of the foot on the other block.

Push down and forward strongly through the hands.  Stay here, make sure you are firm but calm.  No need to go further.

High plank
Then slowly move to high plank.

You want to try to avoid sagging in the shoulders or hips here.  That means you need to really push down and forward with your hands into the blocks. Lift the lower ribs into the upper back.  

With your feet, you also push on the edge.  

The tummy needs to be firm in a way that you can breathe into it so you might just try the high plank on these blocks, rather than the whole sequence. 

Legs are firm as well.  Pushing thigh bones to sky.

You can stay here if you like.  No need to go further.

Upward facing dog
I have skipped the push up we did.  Too stressful for most.  Instead, you could try up dog. 


Again, you push your hands down and forward. Armpits pressing down. Strong in the legs so you do not sag.  

We lowered our pelvis carefully so there is no strain in the lower back.  We kept the firm tummy we had in the high plank.

We lift the chest to lengthen the front without squashing the back. 

Go back through high plank and down dog.  

Lunge
Step a foot forward for a high lunge.


Front foot pushing down and forward strongly.  Pressing with back foot as well. Trying to keep hips raised and tummy stays firm.

You can stay or raise the body and arms.


Hip variation
From there we lowered the torso, hands to block.  We turned the front foot out to the side and allowed the thigh to drop out as well.


Keep legs firm.  Raise the body if you like but remember to lengthen the front without squashing the back.  Do not feel squashing anywhere. 


Back and do it all again on the other side
Back to plank and down dog and repeat on the other side.

Optional extra
Since we were up there already, we decided to try a side split.  

Make sure you try and push the feet down and feel as though you are trying to pull them together.

Ankles are firm. Tummy is firm. 

The end
This was a fun sequence for us to try and enhance our practice.  You can get lazy with your yoga practice sometimes and this type of practice forces you to be mindful and stable. 

You cannot collapse into your flexibility here.  Being between the blocks obliges you to be strong. 

We tried downward dog and handstands after this.  They felt light and free.  Although I was pretty tired I must say!

I always recommend you practice with a teacher.  Do not do anything that strains, squashes, or hurts.  

Happy and safe practicing.

www.yogacafecanberra.blogspot.com
www.artofliferetreats.com
www.yogacafelk.blogspot.com

Friday 6 March 2015

Touch of Earth: A Short Film On Yoga

One of our Canberra yogis directed and produced this film.  She has a beautiful eye.  Janet had only 10 days to make this film.  What a wonderful job, Janet!  Such talent we have in our little yoga crew.


Sunday 1 March 2015

High Plank Foundation For Firm Tummy And Better Arm Balances


A handstand is an arm balance.  The foundation of the arm balances I do is the high plank.

If I was super strong I could transition from my high plank to bakasana then to a handstand.  But I am a bit weak.

Not all high planks are equal.  Some will not teach you the requisite postural firmness you need for better arm balances.

In this post I show a video where I give some of the fundamentals of the high plank that I do that changed my practice phenomenally and helped me to develop into this handstand.

Watch the video first to see the movement in action.  Then follow the step by step instructions.  I have written about bakasana before so you can also refer to that post (bakasana on a block).

Do not do anything that hurts.  It is better to practice with a teacher.


Get Set
Come onto your hands and knees.  You need to make sure you are using your hands properly so you don't feel sinking into your wrists.  This means pressing with your fingertips, feeling as though you are trying to grip at the floor or make fists.  Imagine there are little holes in the ground like a tenpin bowling ball that you are trying to press your fingertips into to lift up the ground.

Knees are behind hips.  Shoulders are over wrists.  

Lift ribs into upper back. Can you see how rounded and lifted my upper back is?  This feeling of being broad across the upper back is important.  I feel as though I am pushing the arms downwards into the floor.  My shoulder blades come right around the sides of my chest.

My sitting bones go down towards the back of my knees and top of pelvis moves towards the sky to lengthen my lower back.  My lower back is not arched.

The sense is the entire back of my body is lengthened.  This shape is important.  You will need to maintain it.

The actions in my arms are important and maintained.

I push my armpits in the direction they are facing.  Here that sort of means down and back.

I push my hands down and forward--away from my knees.

I feel as though I am pulling my knees towards my hands.

I feel as though I am pushing my hips forwards towards my hands but they do not go anywhere.

You cannot really see these actions.  That is what makes the practice of this posture difficult.  My kneeling plank is already cultivating a postural firmness for me so that my tummy is getting firm through the posture but in a way where I can still feel that when I breathe the tummy can move.

In fact, if you look at my waist area you can see it is like I have little gills there--you can see movement when I am breathing.  I am breathing a lot here! It is hard.  If I could I might try to breathe less.

Lift Up
Maintaining all previous actions, I put the tips of my toes on the ground and lift my knees.


I am careful not to sag my chest or lower back.

Performed well, you should feel very firm in the tummy area without needing to actually try to firm it.  It should come naturally because of the posture.

See how I am trying to be right on the tops of my toes.  Not the balls of the feet.  That is important.

Tip toe forward
From there I try and maintain the same actions but I just tip toe forward--on the very tops of my toes.


A common challenge as you tip toe forward is to keep the tummy firm.  It helps if you keep your knees bent and stay on the tops of your toes.  

I keep all the same actions from before, lifting chest up into upper back, sitting bones down and top of pelvis back to lengthen lower back, feeling as though I am moving my hips forward.

Stay or bakasana
You can just try and stay there, on the very tops of your toes, lifting your chest, firming your tummy.  It is really hard!!


Or you can initiate bakasana by dropping your butt a little, lifting your knees up higher as though into your chest, lightly resting them on our upper arms.


You can stay there or, if you feel light, you can lean forward until the toes feel light and then you can pull the heels into the bottom.


You can still see my little gills breathing.  That is important.  I am firm but calm.

Optional extras!
I am too chicken to do handstand on a bench like that.  I have not yet got the strength.

But if you have built these foundations then a handstand should get easier.

I do the same thing but get onto my tip toes and start to take one leg up.


I give a little tap...


...and up I come...


Sthira sukham asanam.  Firm but calm.

Summary
I have written a few posts about bakasana and even kneeling plank and plank before.

That is because they are really important!

Get a good high plank.  Then keep the actions and get a good bakasana.

These will help build the foundations.

There are other poses that you can do from bakasana so that you do not need to kick up into handstand but instead float from bakasana straight up.  I am still working on that one!  In the meantime, I enjoy the inversion with free spine.

This is the type of step by step approach to movement and posture I use in classes, workshops, and retreats.  You are welcome to join me any time!

Happy and safe practicing.

Much metta,
Samantha

www.artofliferetreats.com
www.yogacafecanberra.blogspot.com
www.yogacafelk.blogspot.com